Step 01
Find the right assessmentBrowse a clear test catalog.
Students can discover available test sets, distinguish tests from practice, and continue from a focused dashboard.
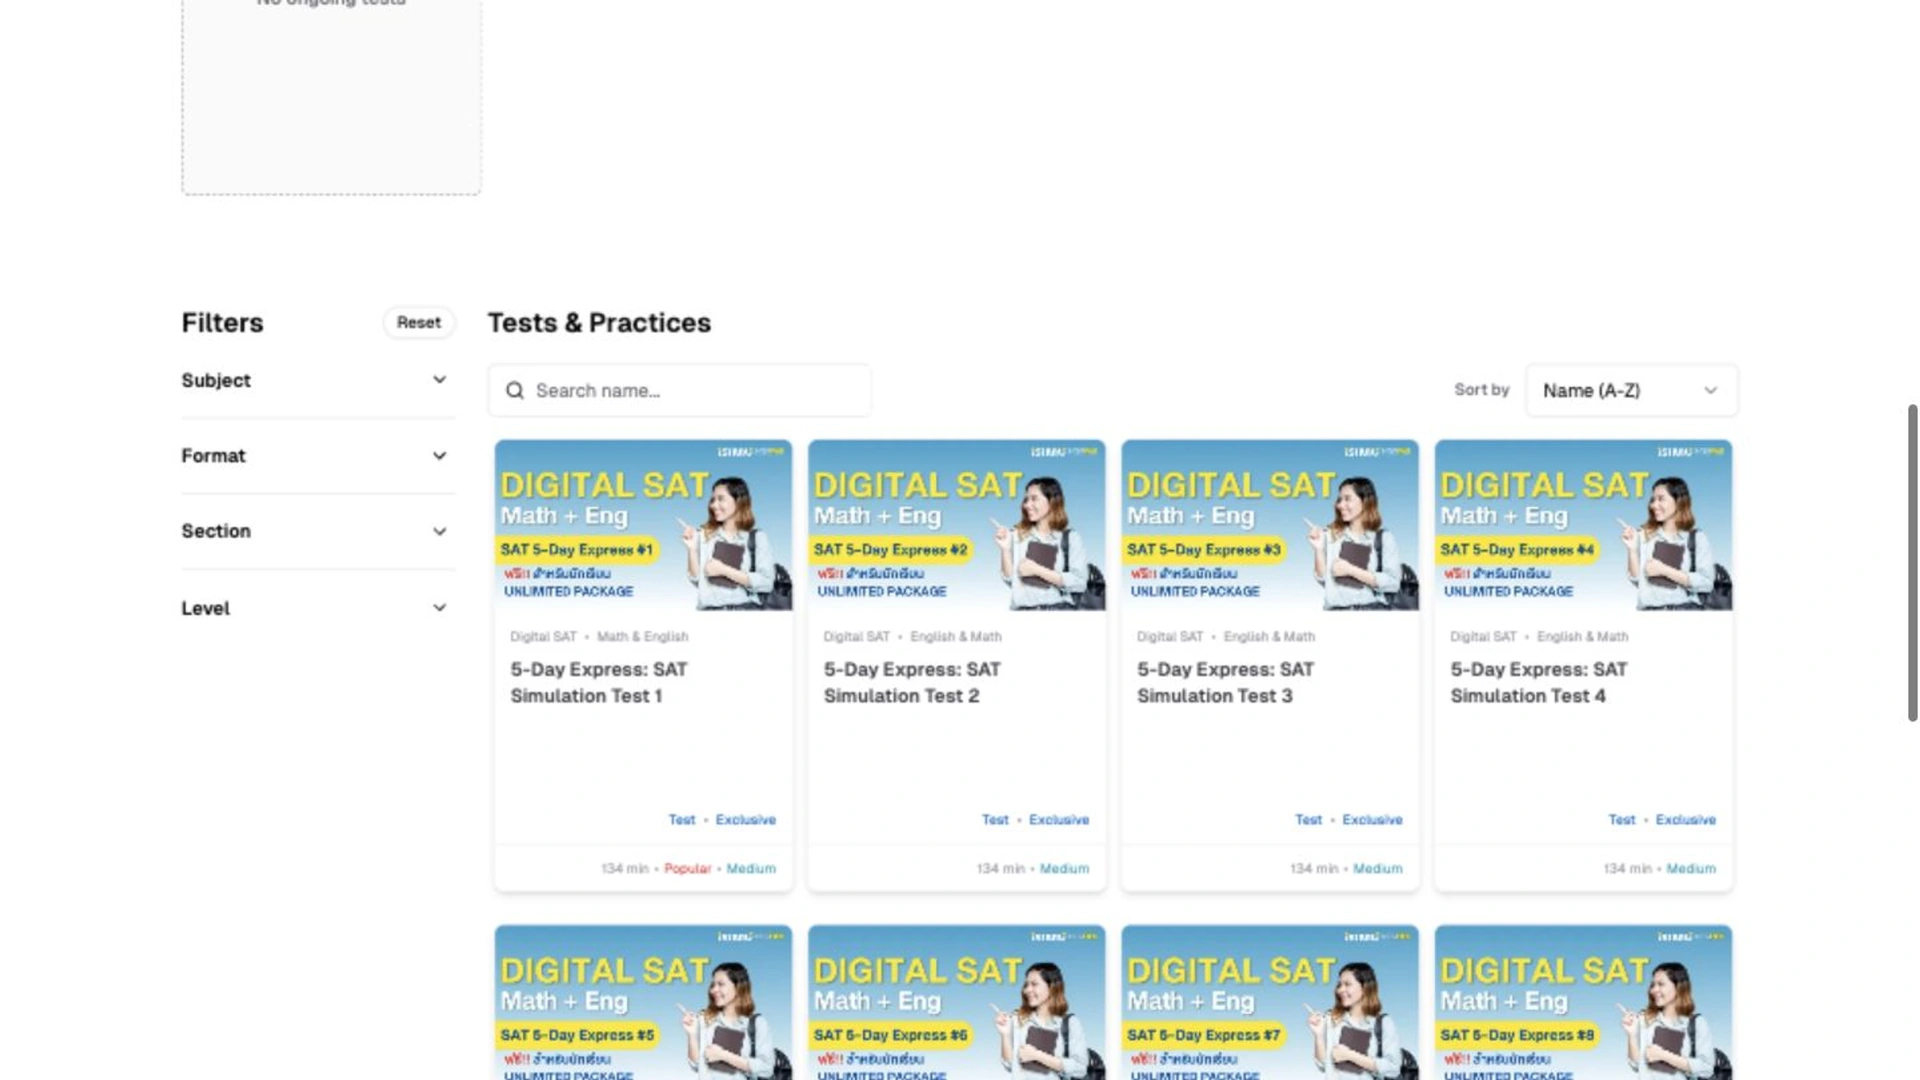
Find the right assessmentstudent-catalog

A complete product walkthrough
Follow the connected workflows students and education teams use to run realistic tests, understand performance, and improve what comes next.
Student testing flow
Students move from choosing an assessment to submitting it in one focused, familiar experience.
Step 01
Find the right assessmentStudents can discover available test sets, distinguish tests from practice, and continue from a focused dashboard.
Step 02
Choose a testA test-set page gathers the description, available assessments, practice options, and past attempts in one place.
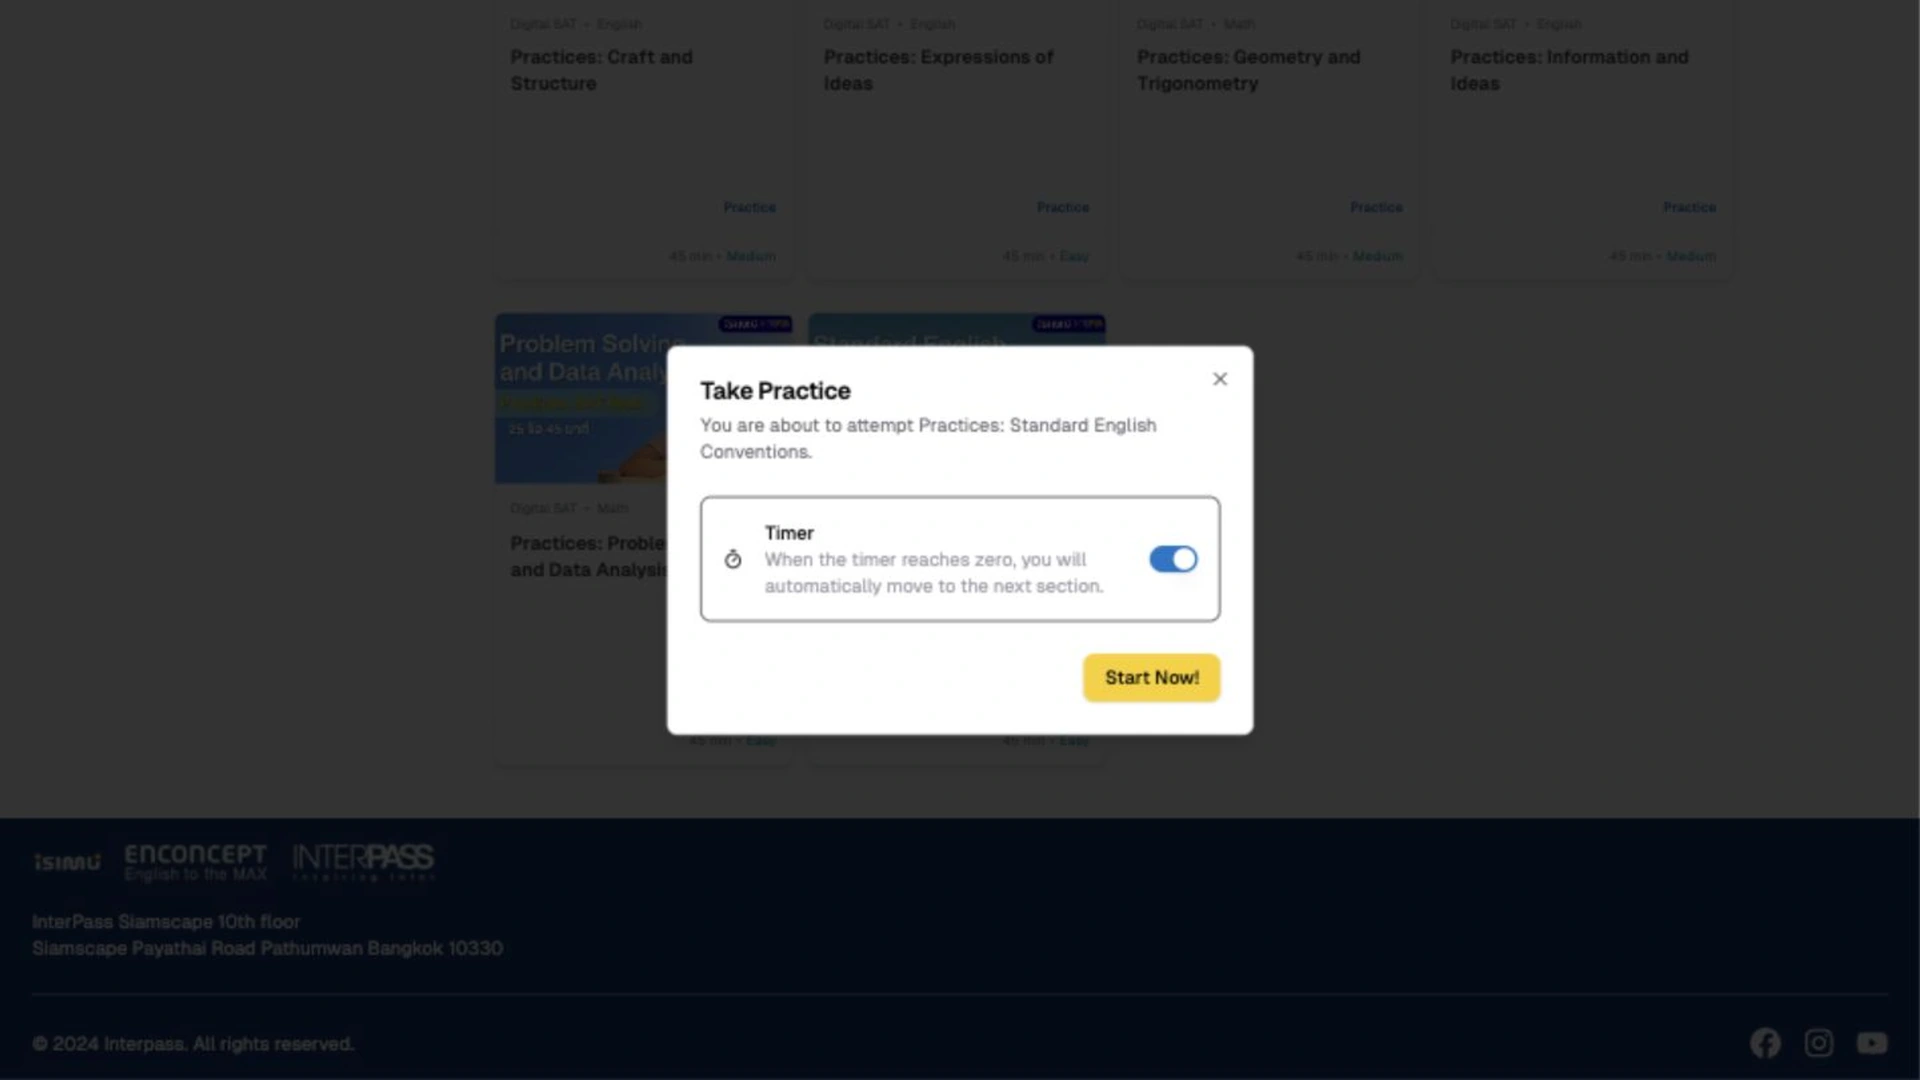
Step 03
PrepareInstructions explain timing, scoring, the testing environment, and whether the session is timed or untimed.
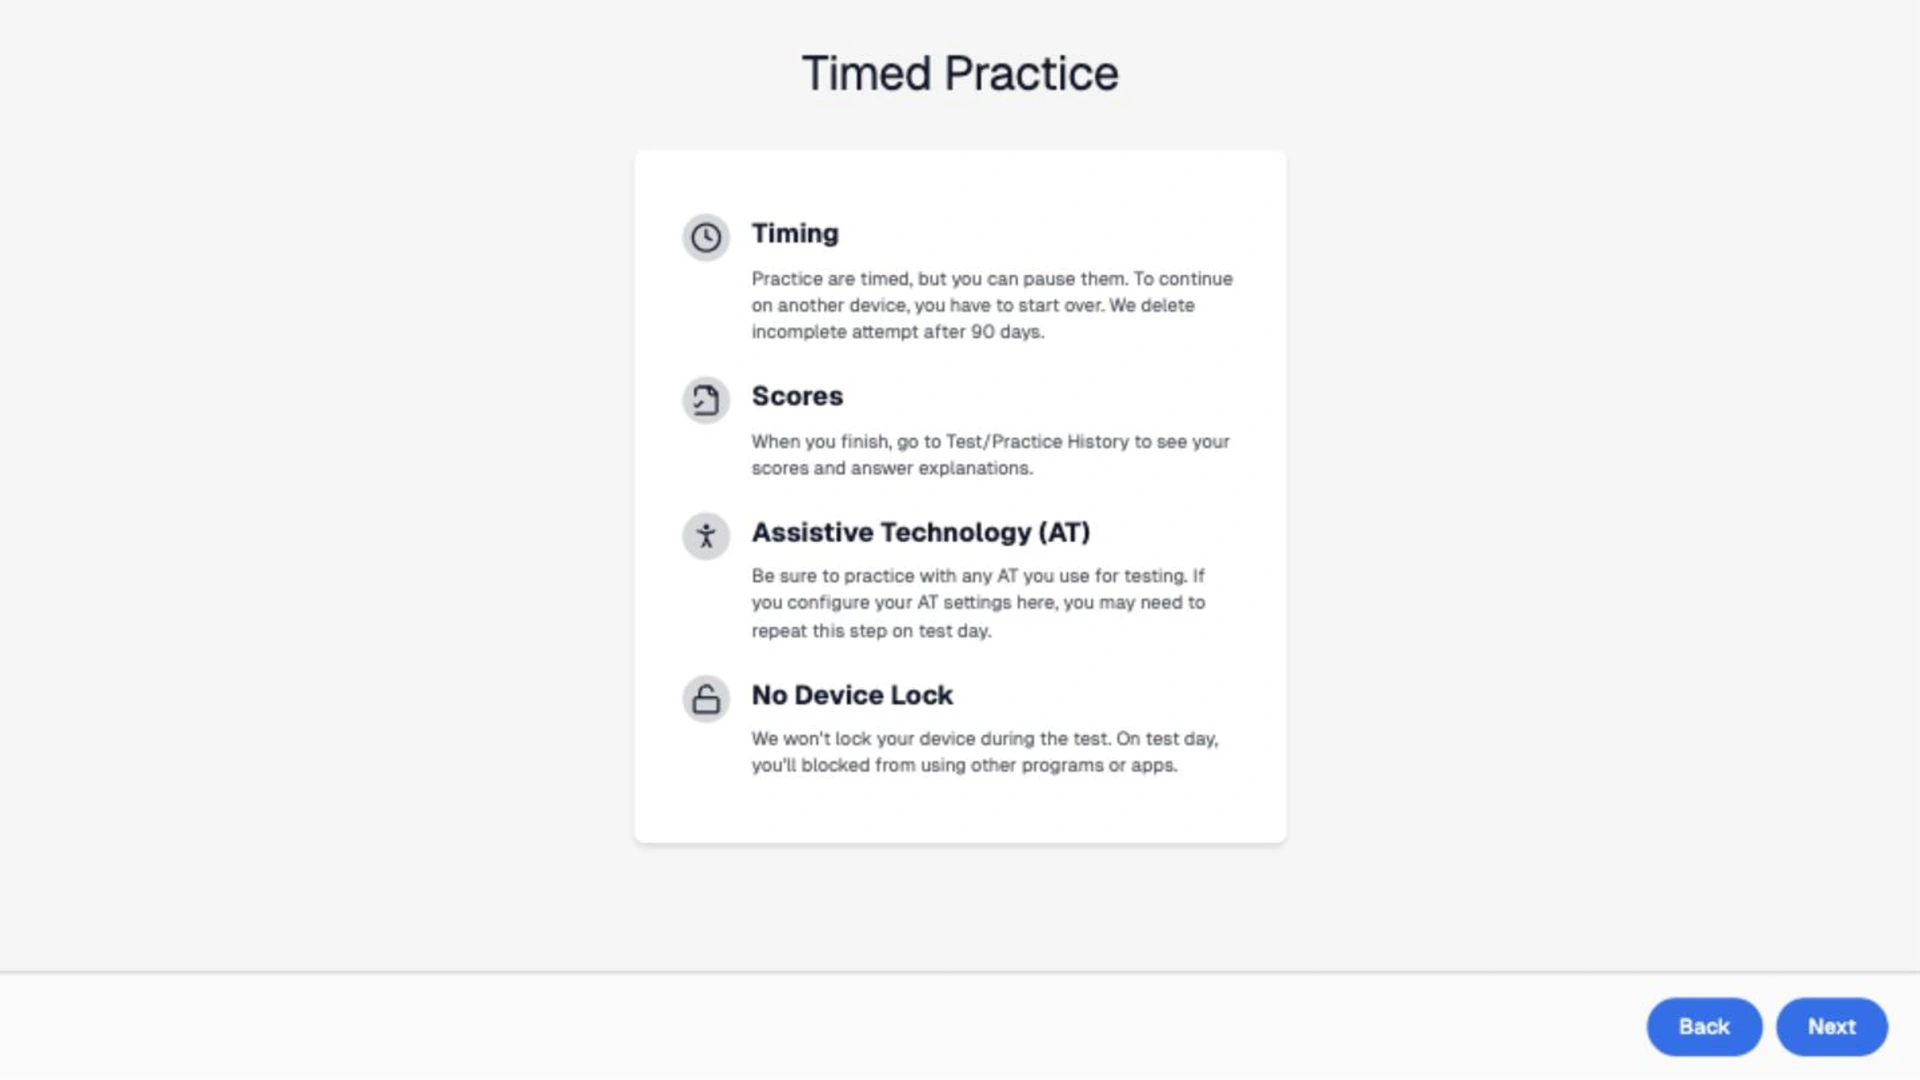
Step 04
Work through the testA focused test interface brings together the timer, annotations, bookmarks, question navigation, Desmos, and math references.
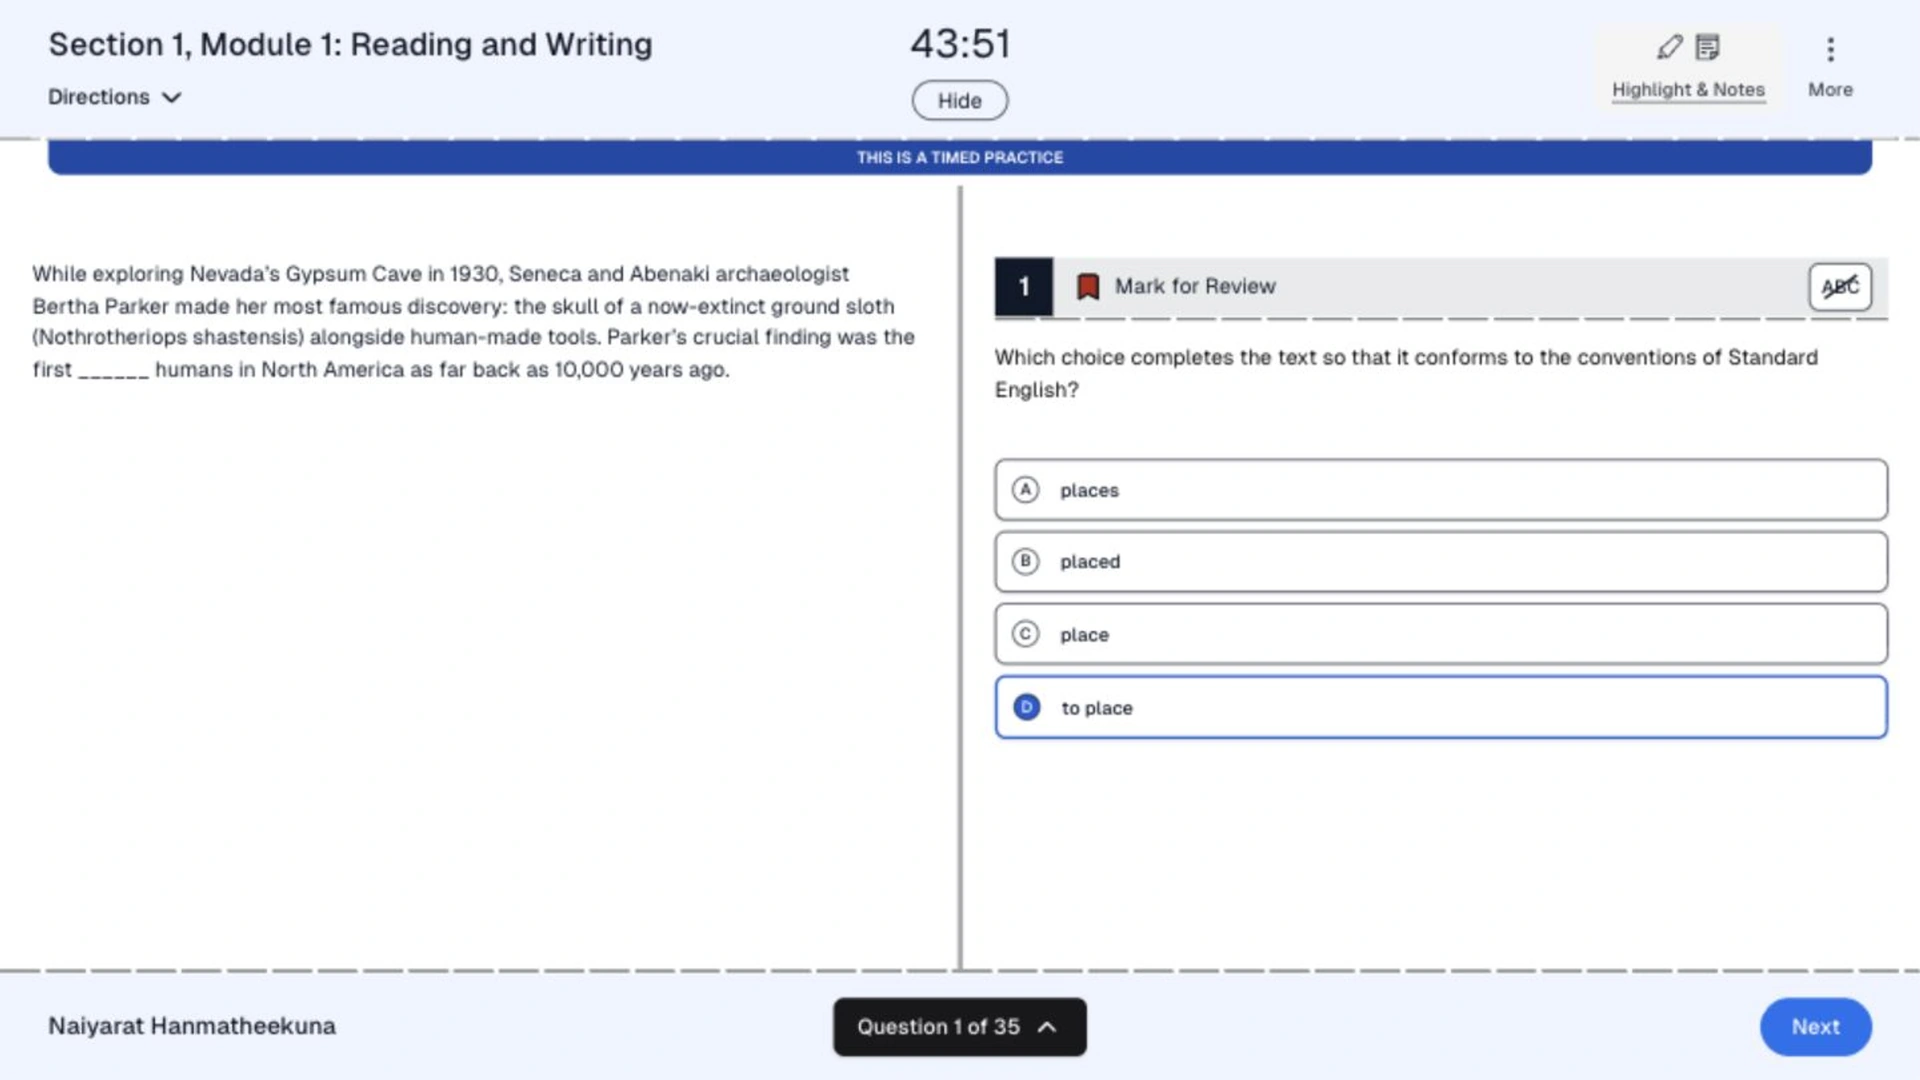
Step 05
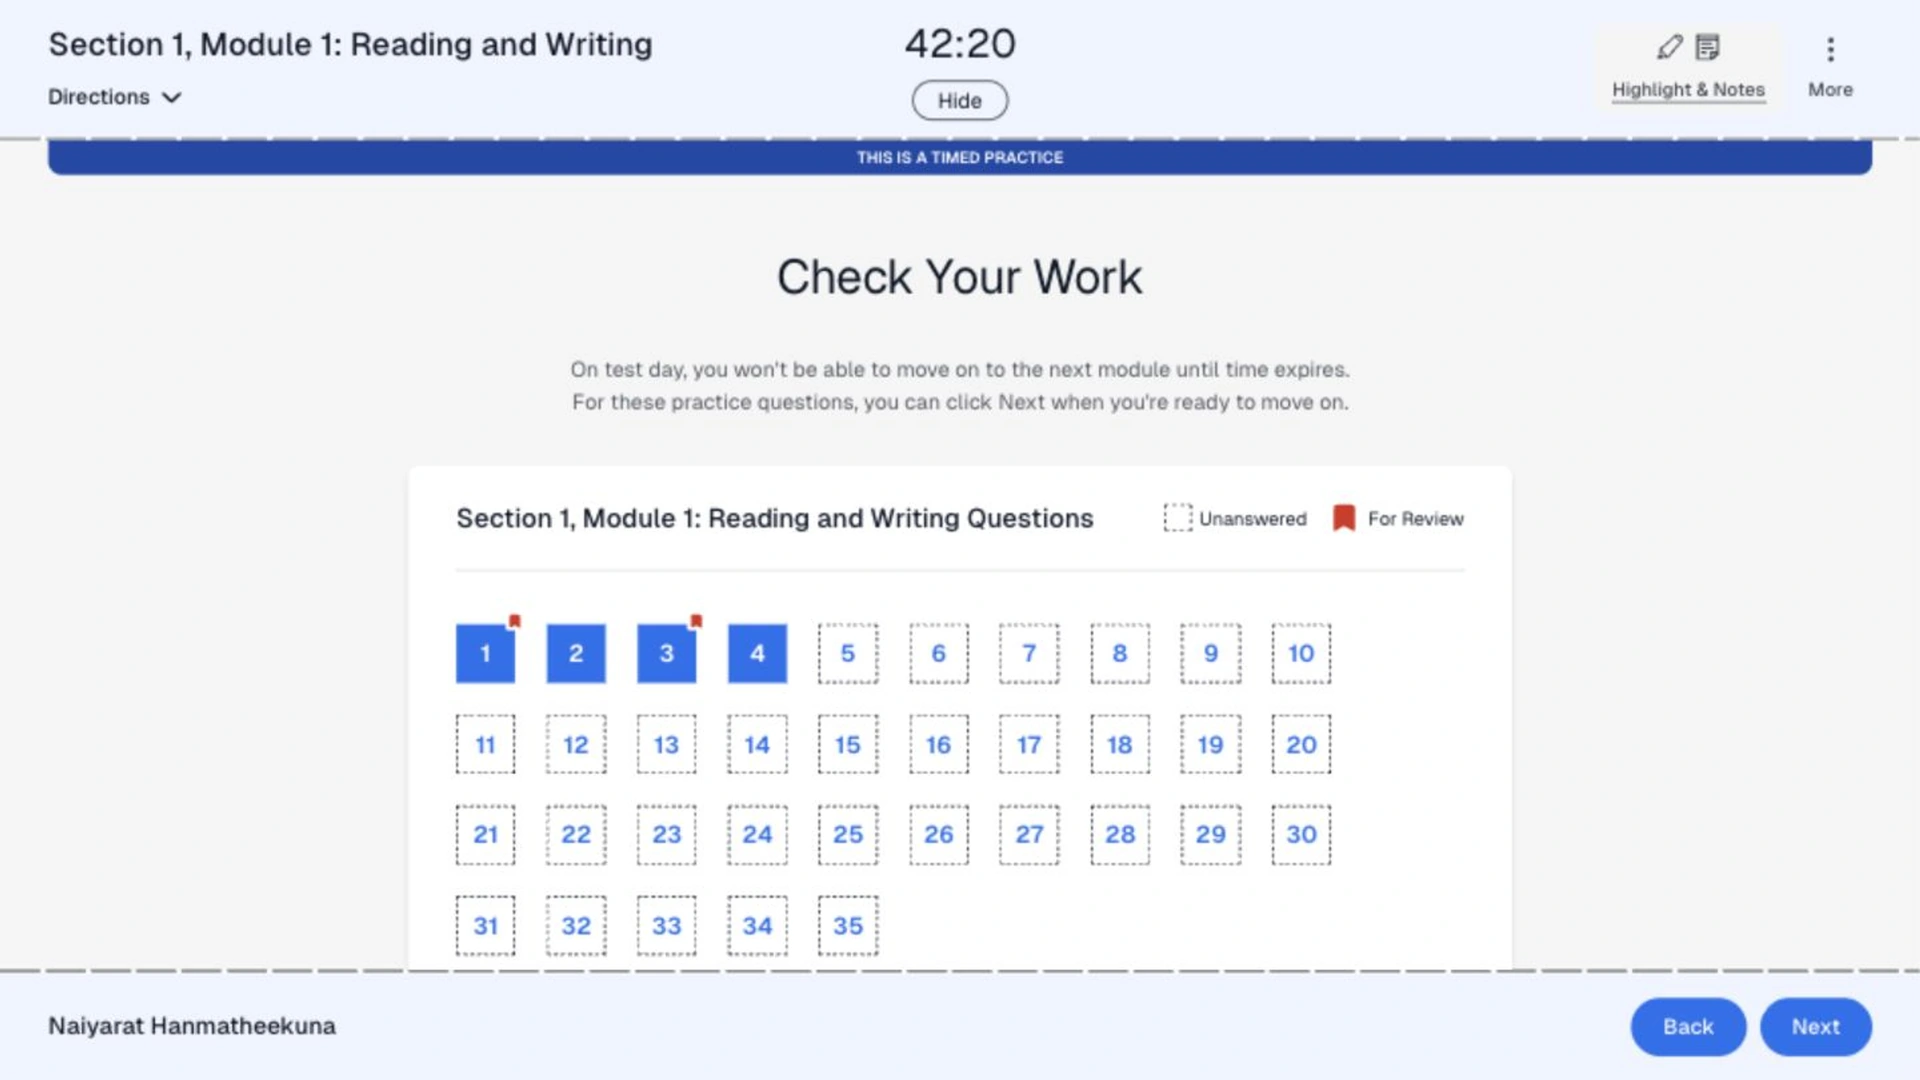
Review the moduleStudents can see answered, unanswered, and marked questions at a glance, then jump back to anything that needs attention.
Step 06
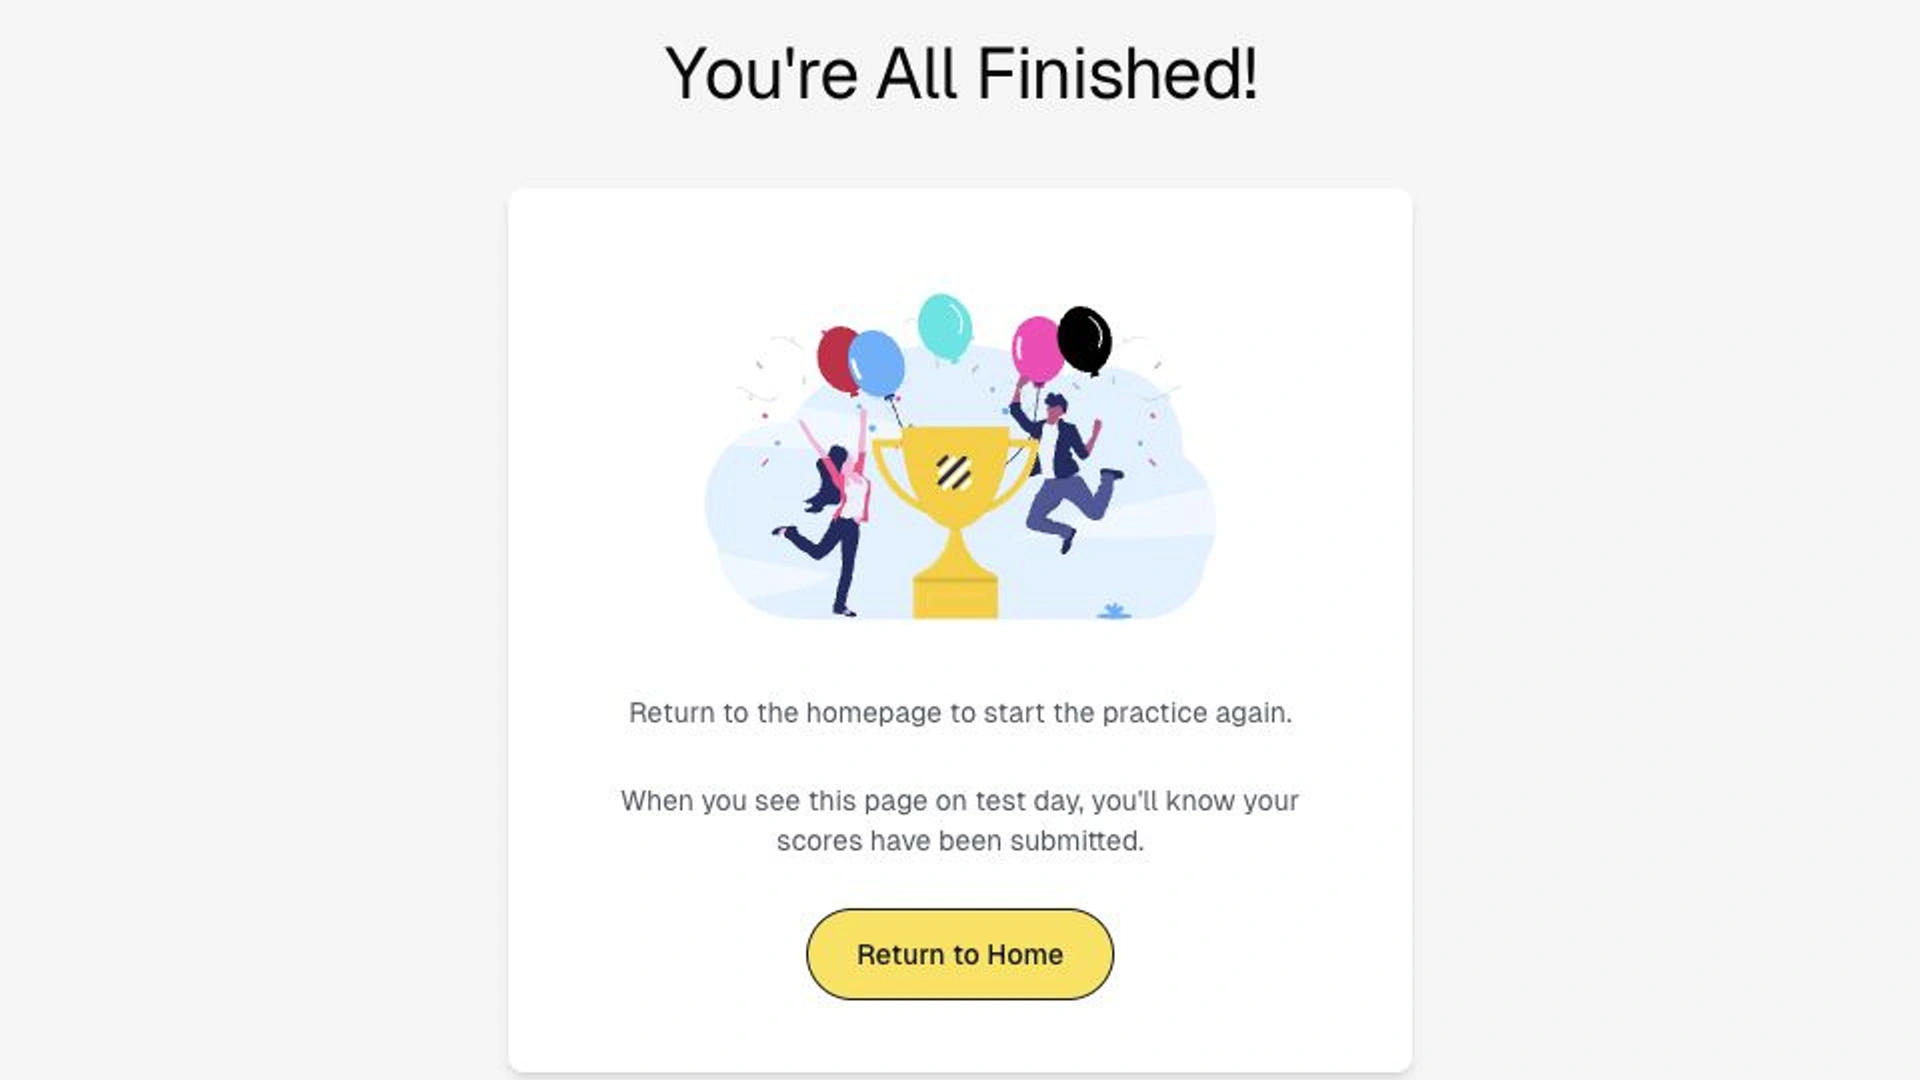
SubmitA calm completion state confirms submission and directs the learner back to their results and learning history.
A structured attempt that feels purposeful from start to finish.
Student review flow
Scores become useful when students can connect them to skills, questions, and explanations.
Step 01
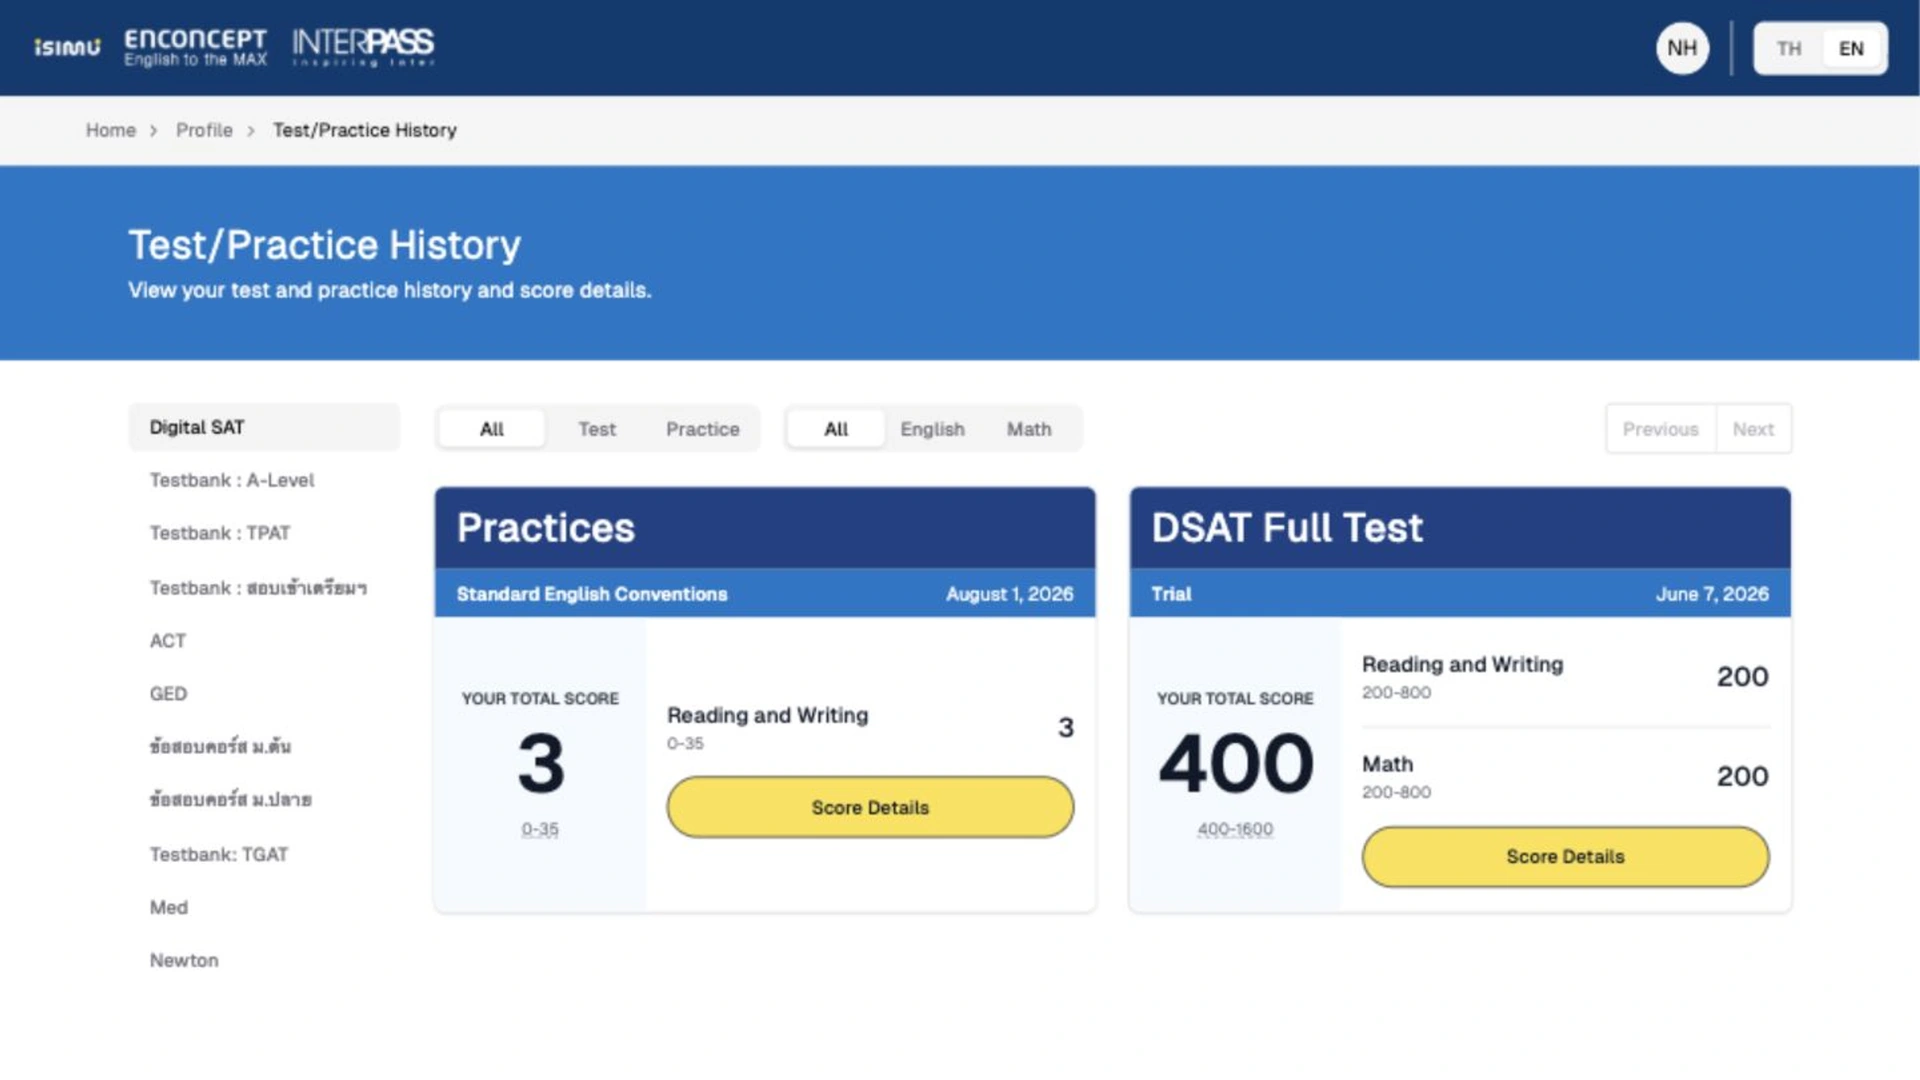
Return to past workTest and practice history makes previous attempts easy to find by assessment, subject, date, and score.
Step 02
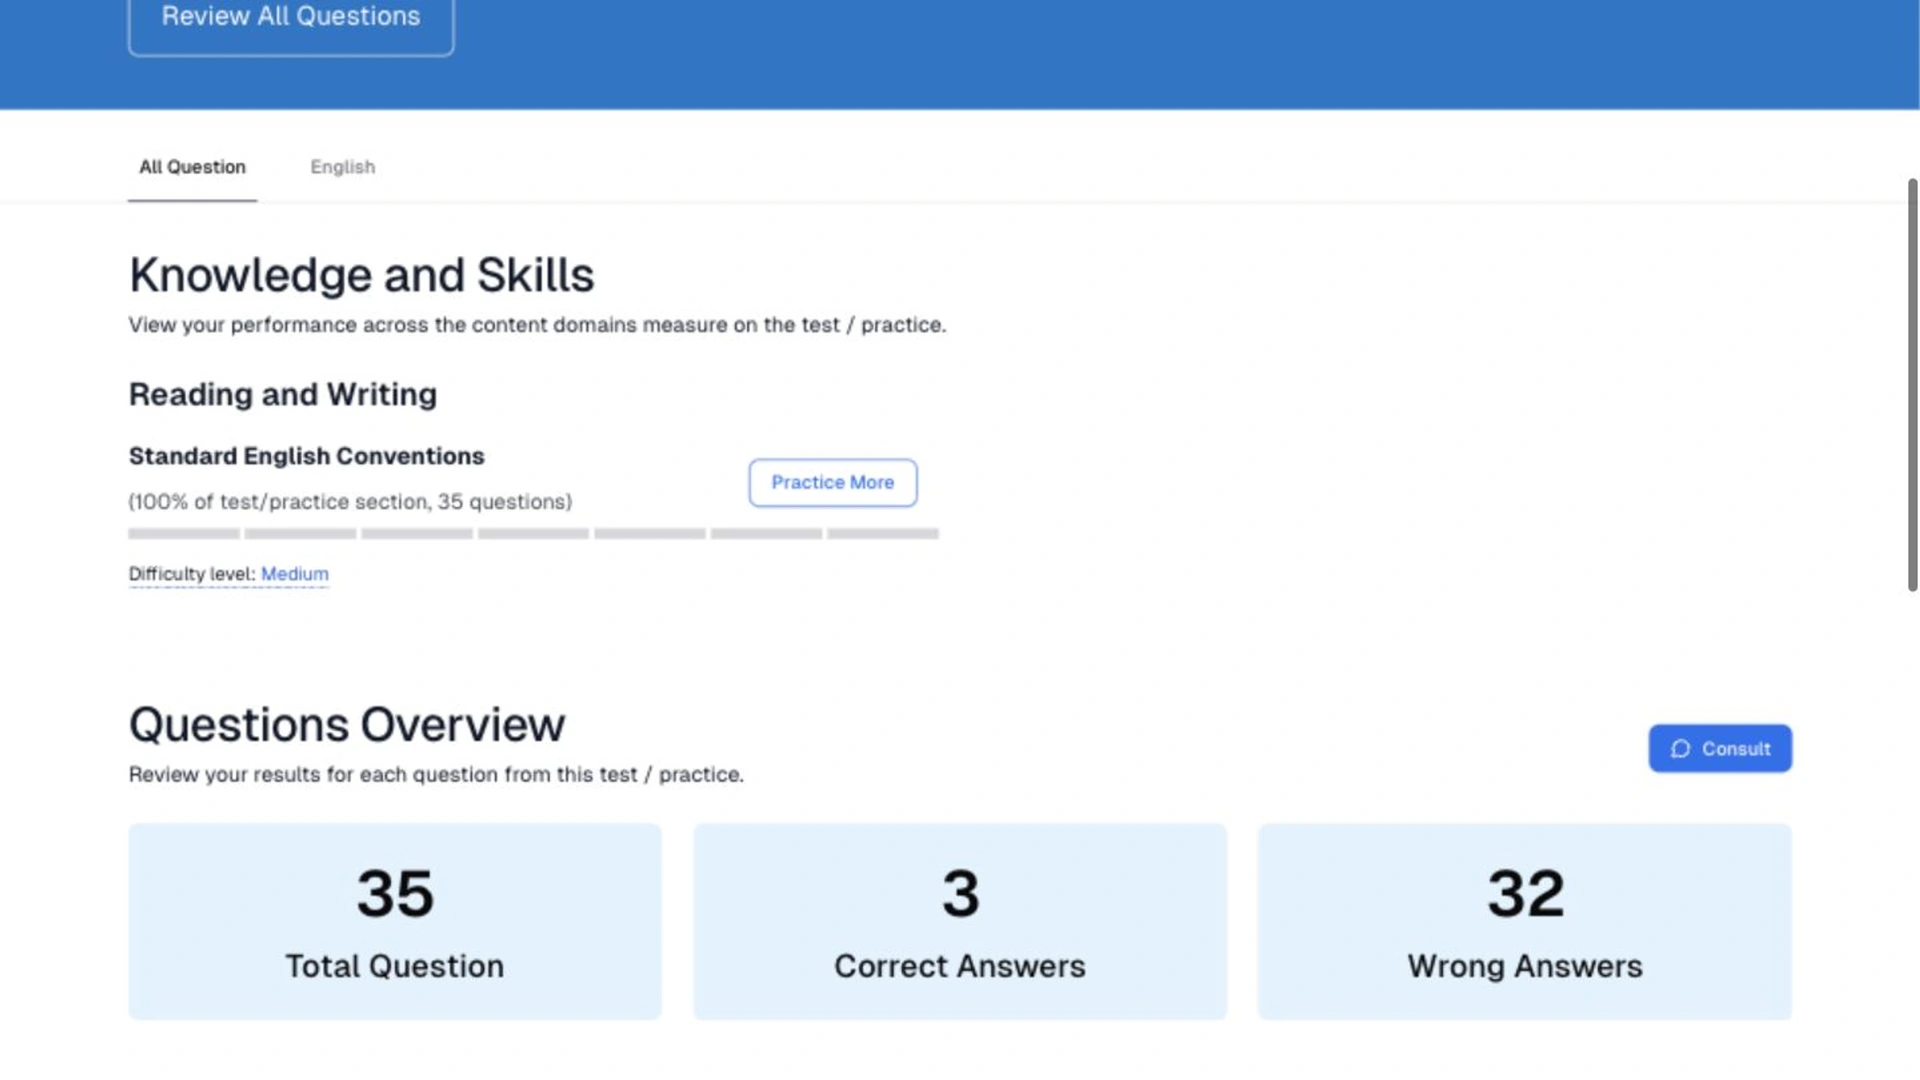
Understand performanceSubject summaries, skill-level performance, and question counts reveal strengths and areas that need more attention.
Step 03
Review each answerStudents can reopen questions, compare their response with the answer key, and read the explanation without losing context.
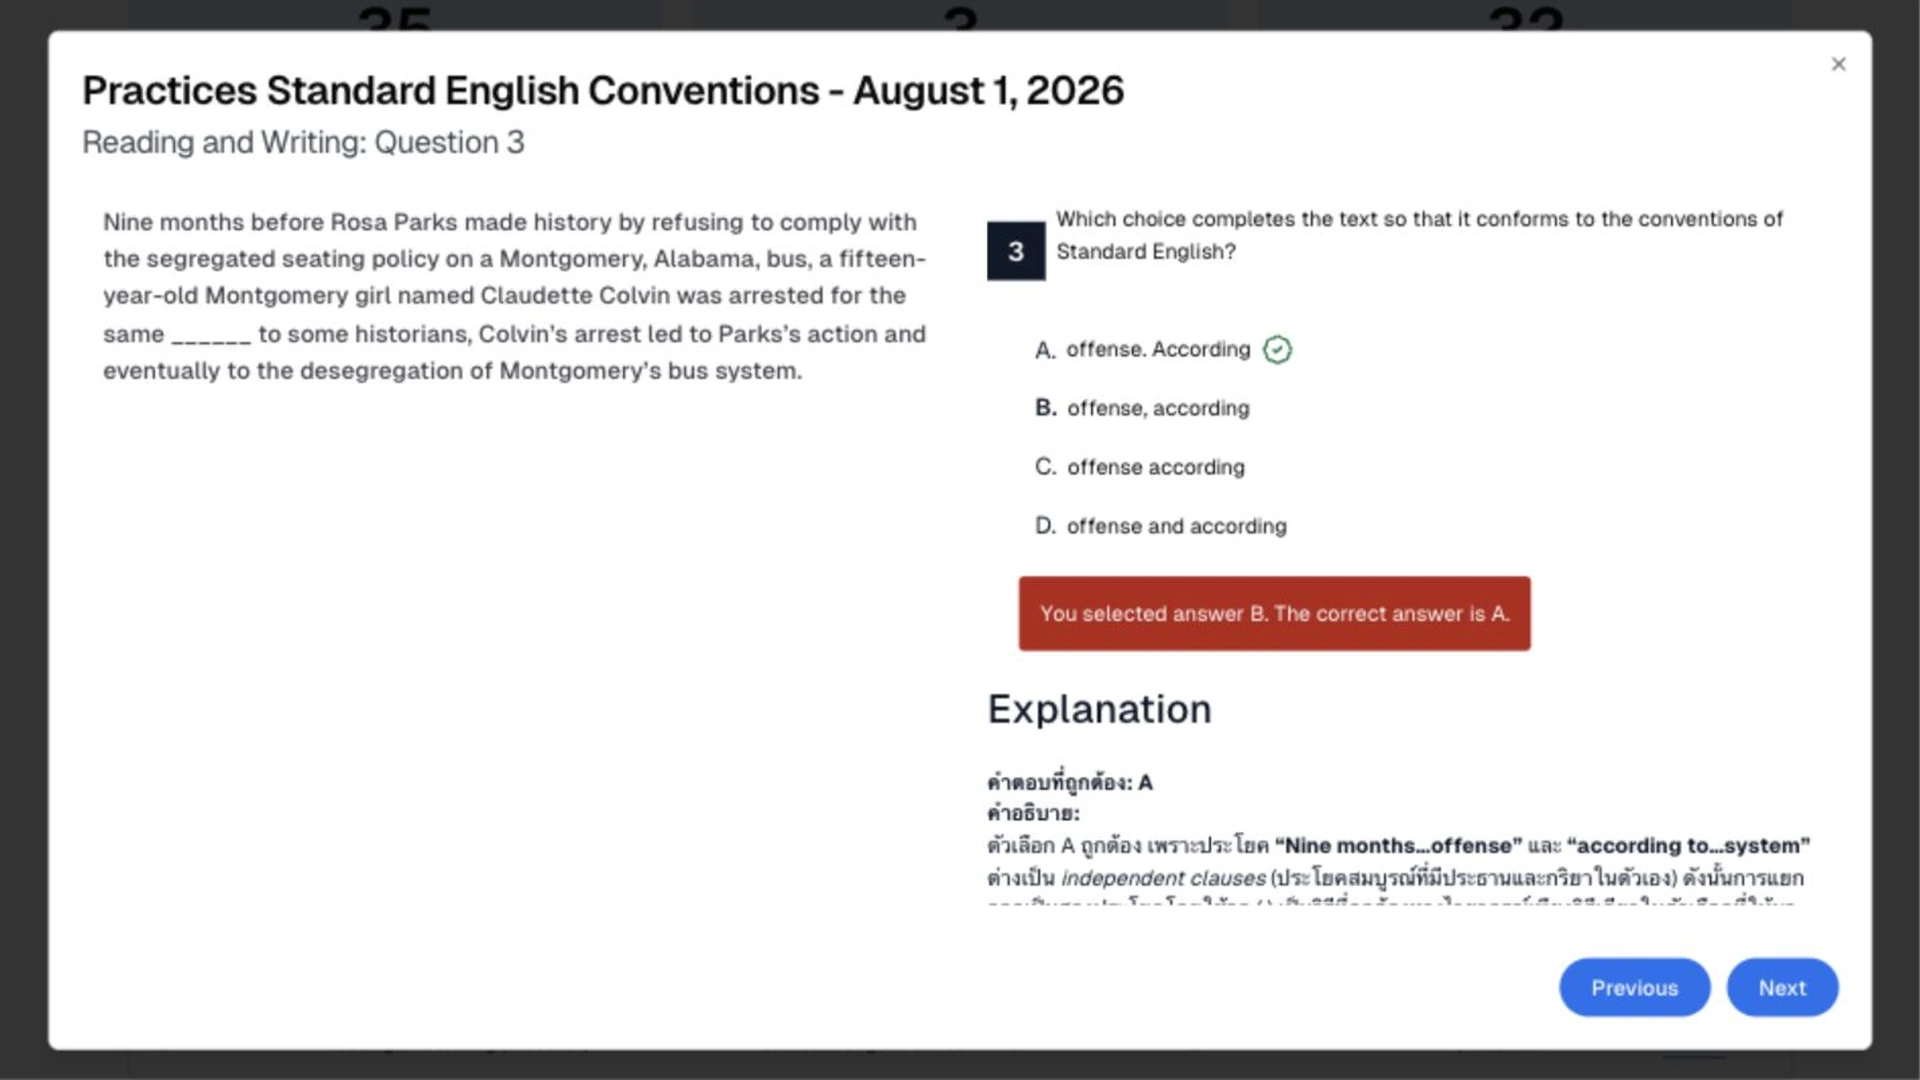
Students leave knowing what they did well and what to practice next.
Admin content flow
The content workspace gives education teams control over test sets, questions, scoring, and releases.
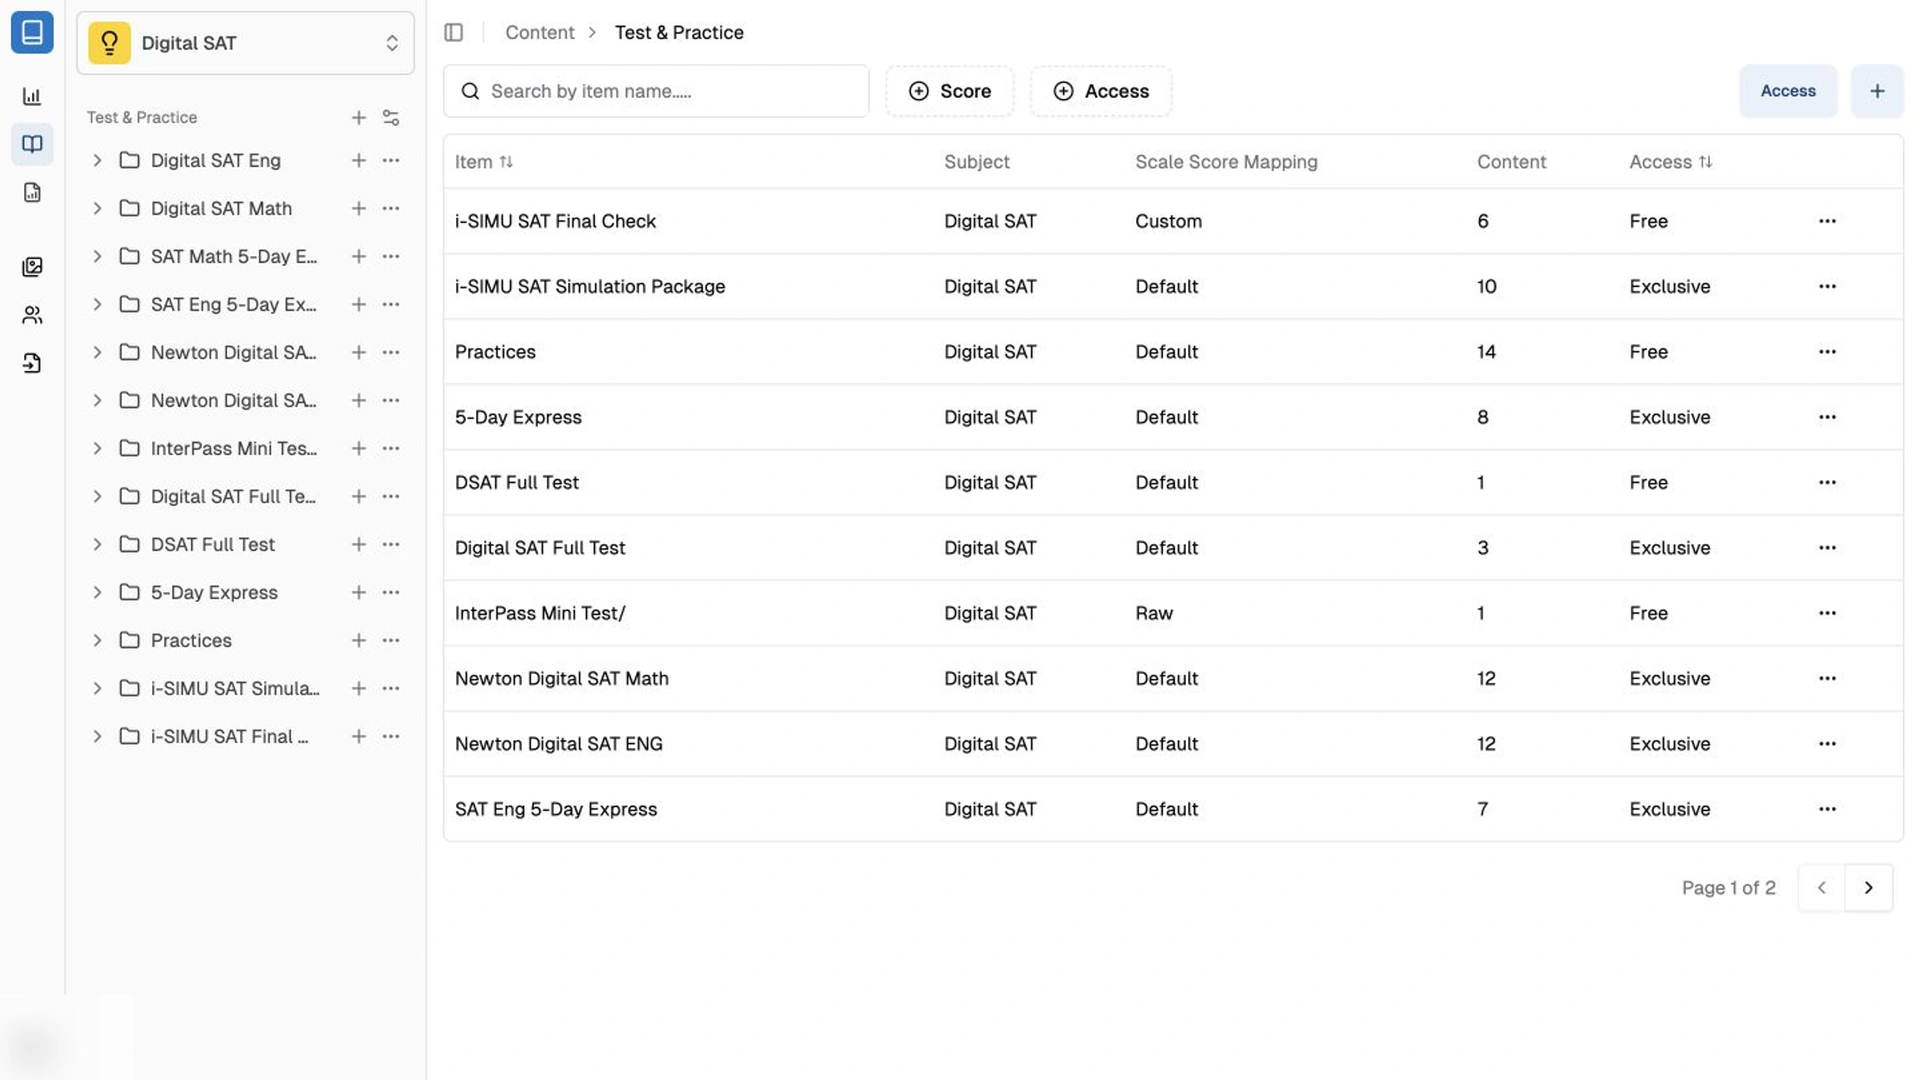
Step 01
Organize the librarySearch, create, and maintain test sets with cover art, descriptions, scoring rules, and clear content status.
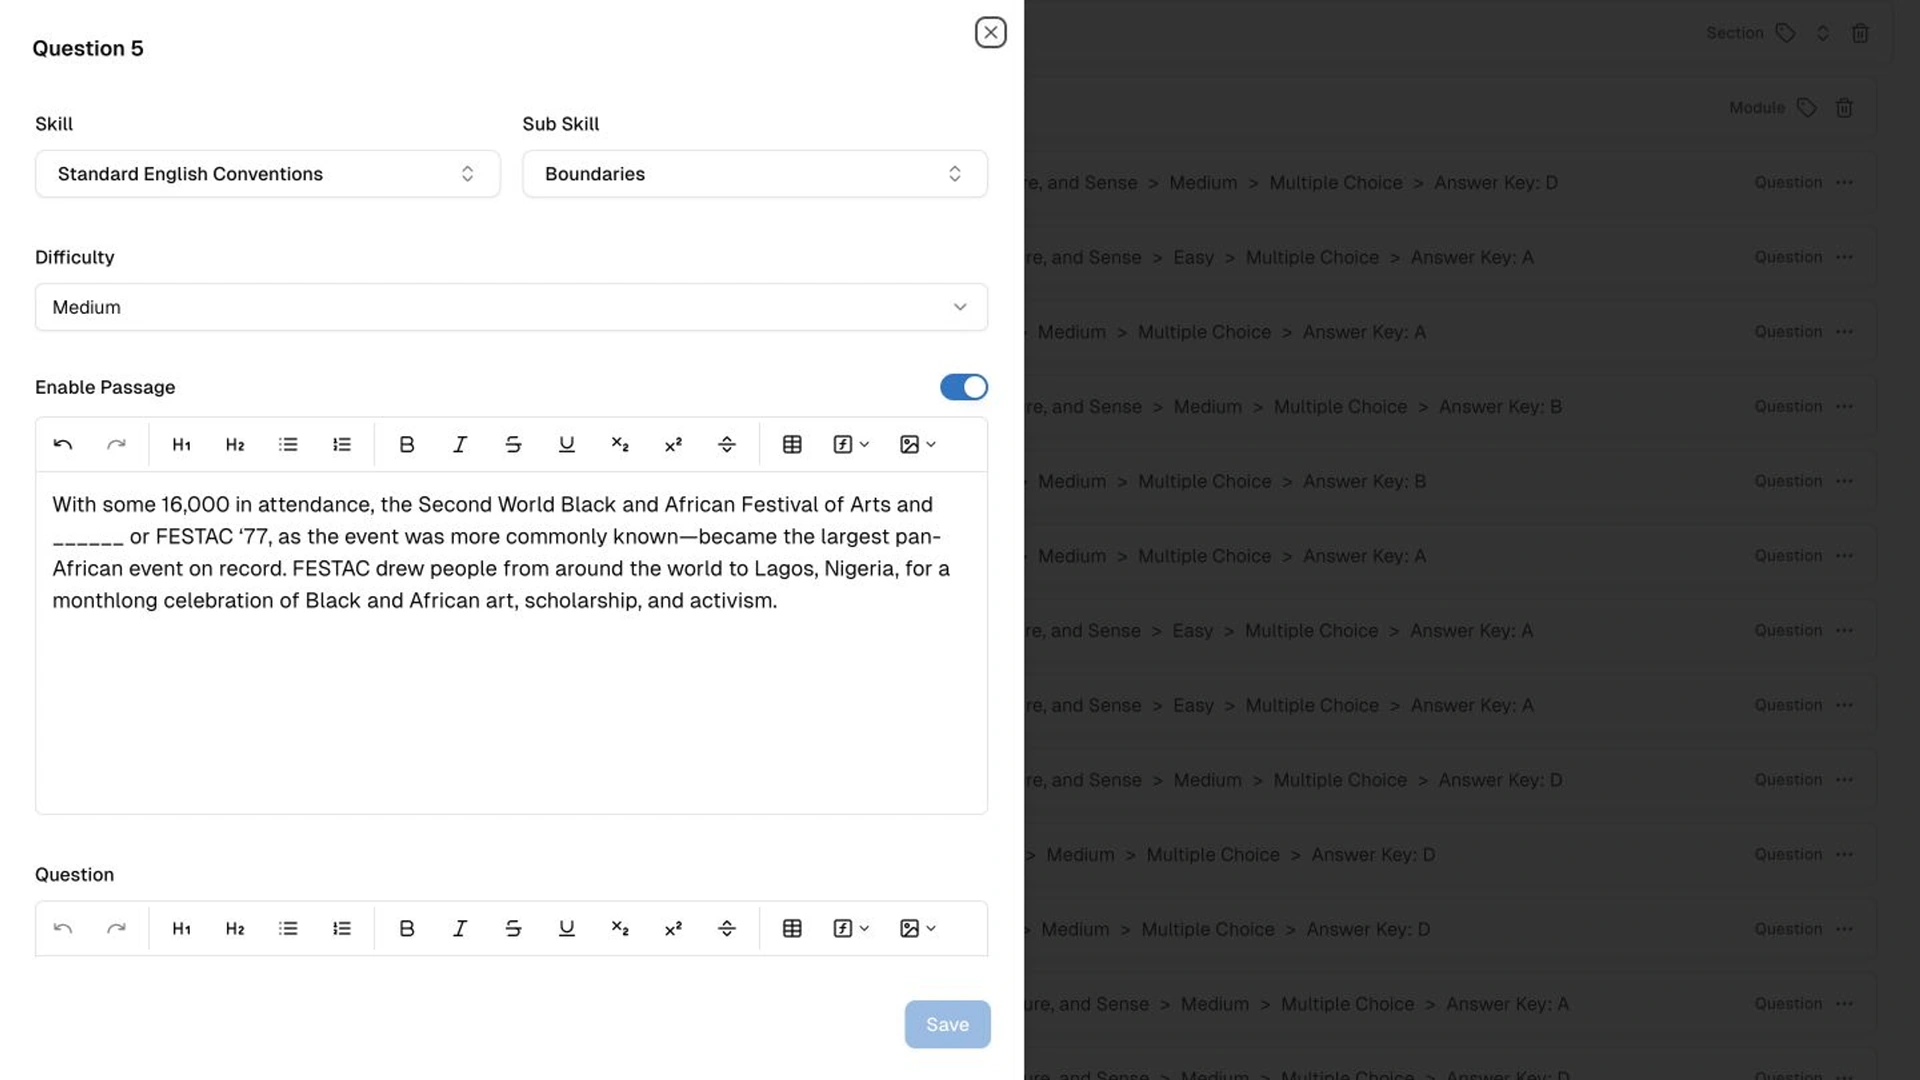
Step 02
Build the assessmentAdmins can add and reorder the assessment structure, edit question content, and manage supporting media from one workspace.
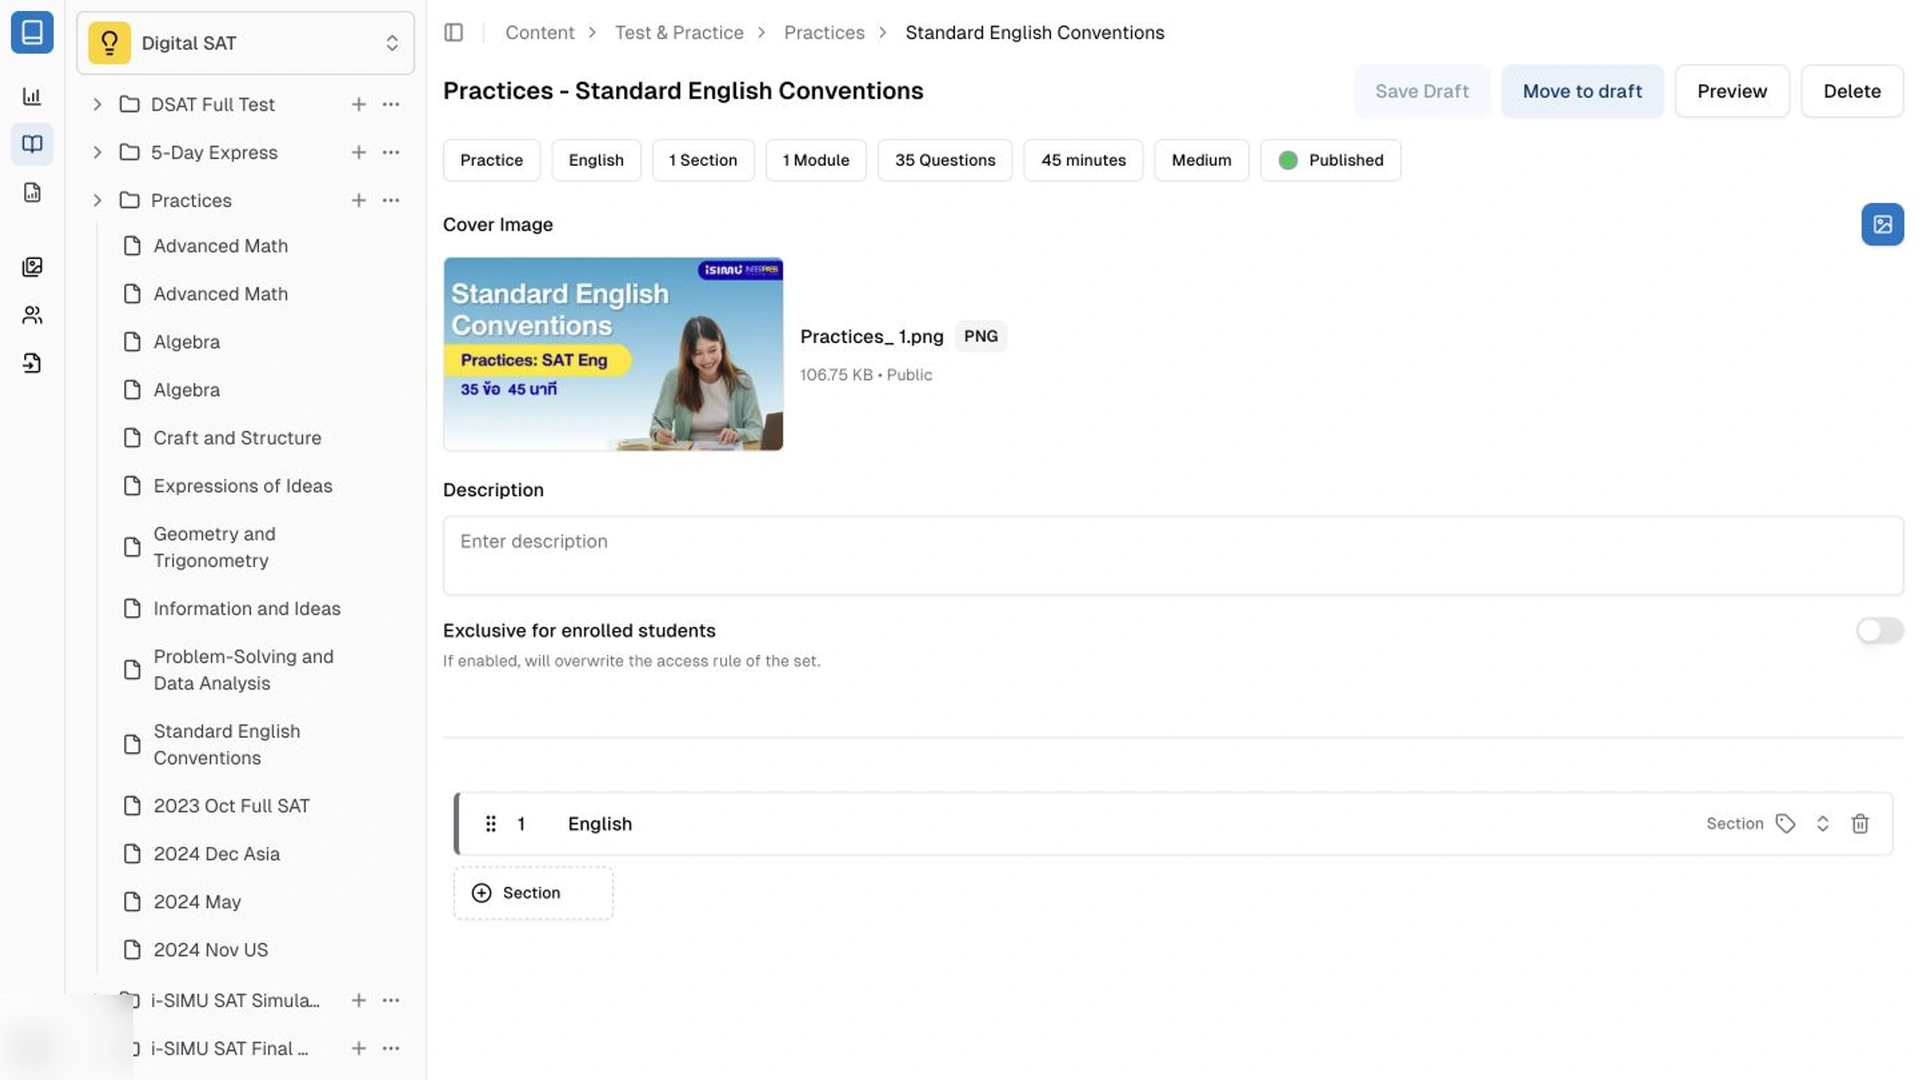
Step 03
Quality checkRun the assessment in preview mode, save changes as a draft, and publish only when the experience is ready.
Step 04
Scale productionSpreadsheet imports identify valid rows and precise errors before content reaches the library, with correction and revalidation in the same flow.
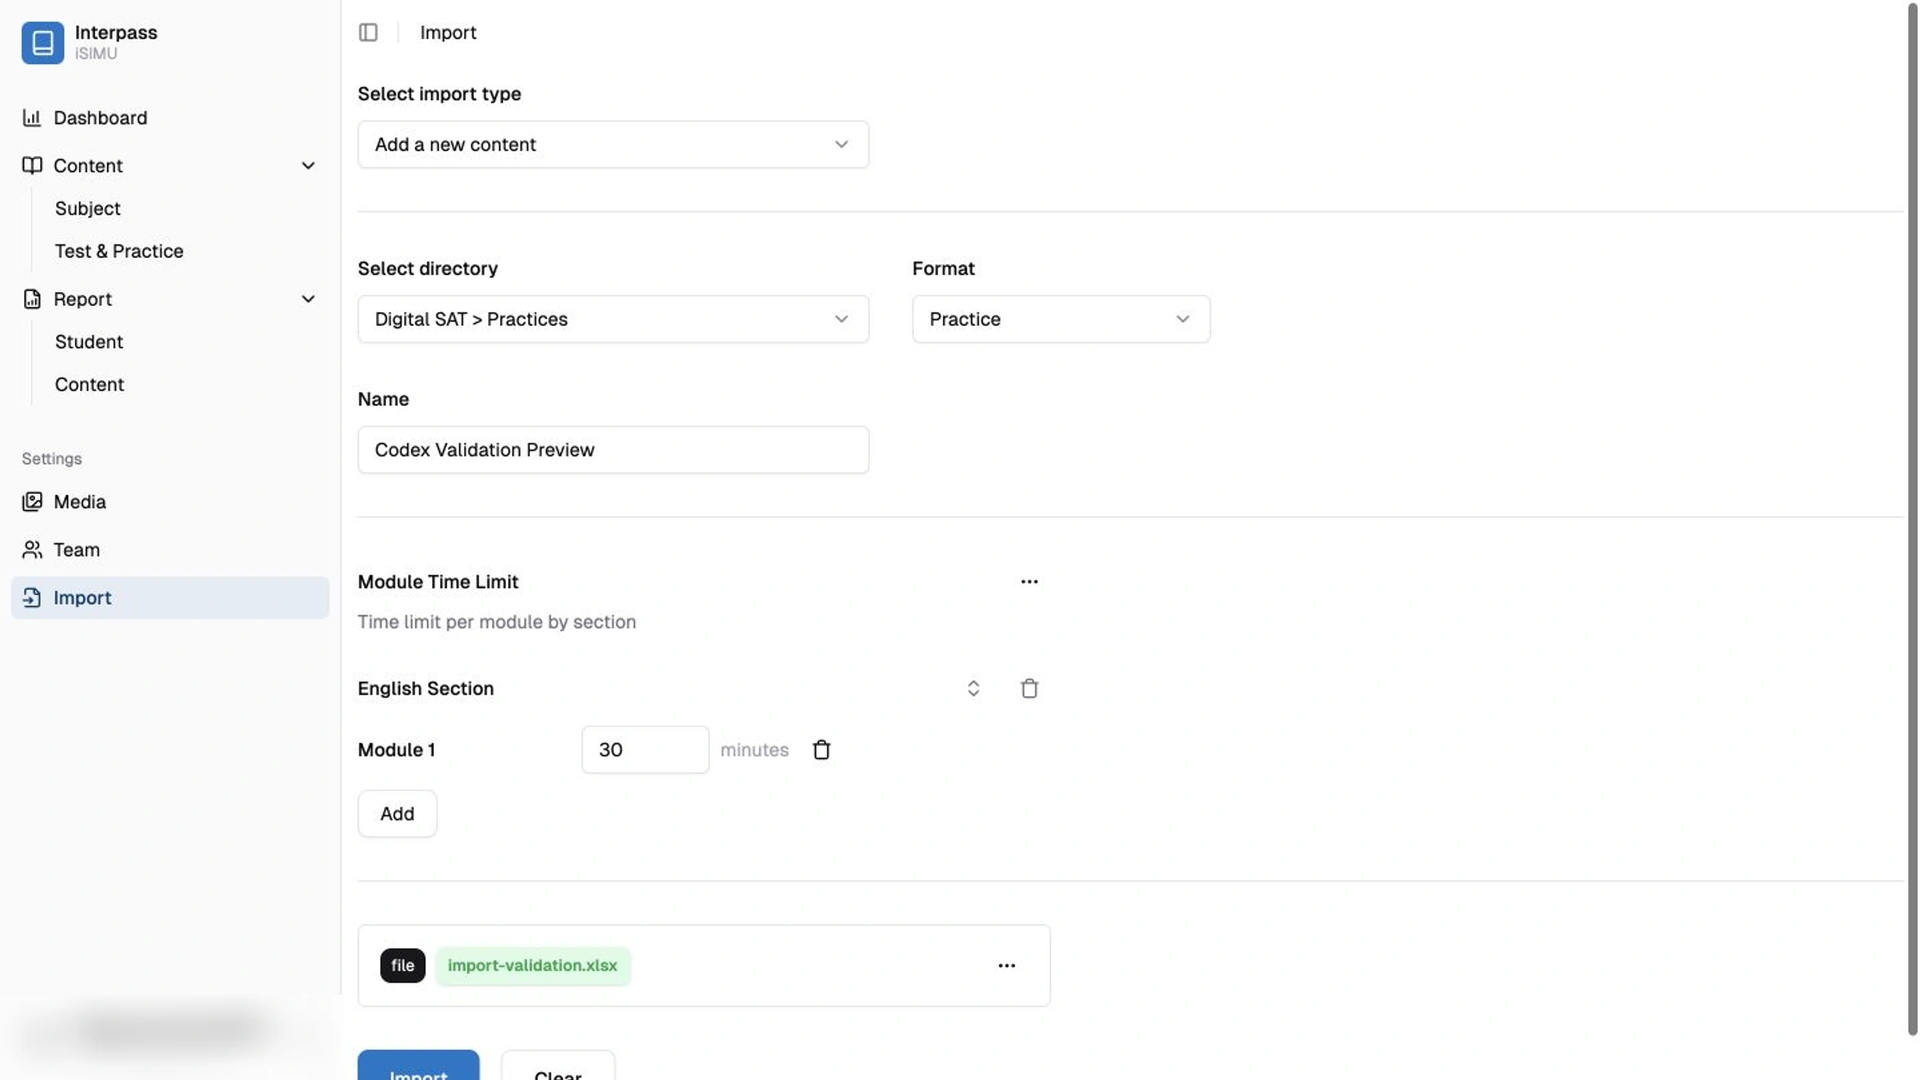
A repeatable publishing workflow without stitching together separate tools.
Admin reporting flow
Reporting connects operational trends with the detail teachers need to support an individual learner.
Step 01
See the big pictureActive users, new accounts, growth, score distribution, and subject popularity give leaders an immediate operational view.
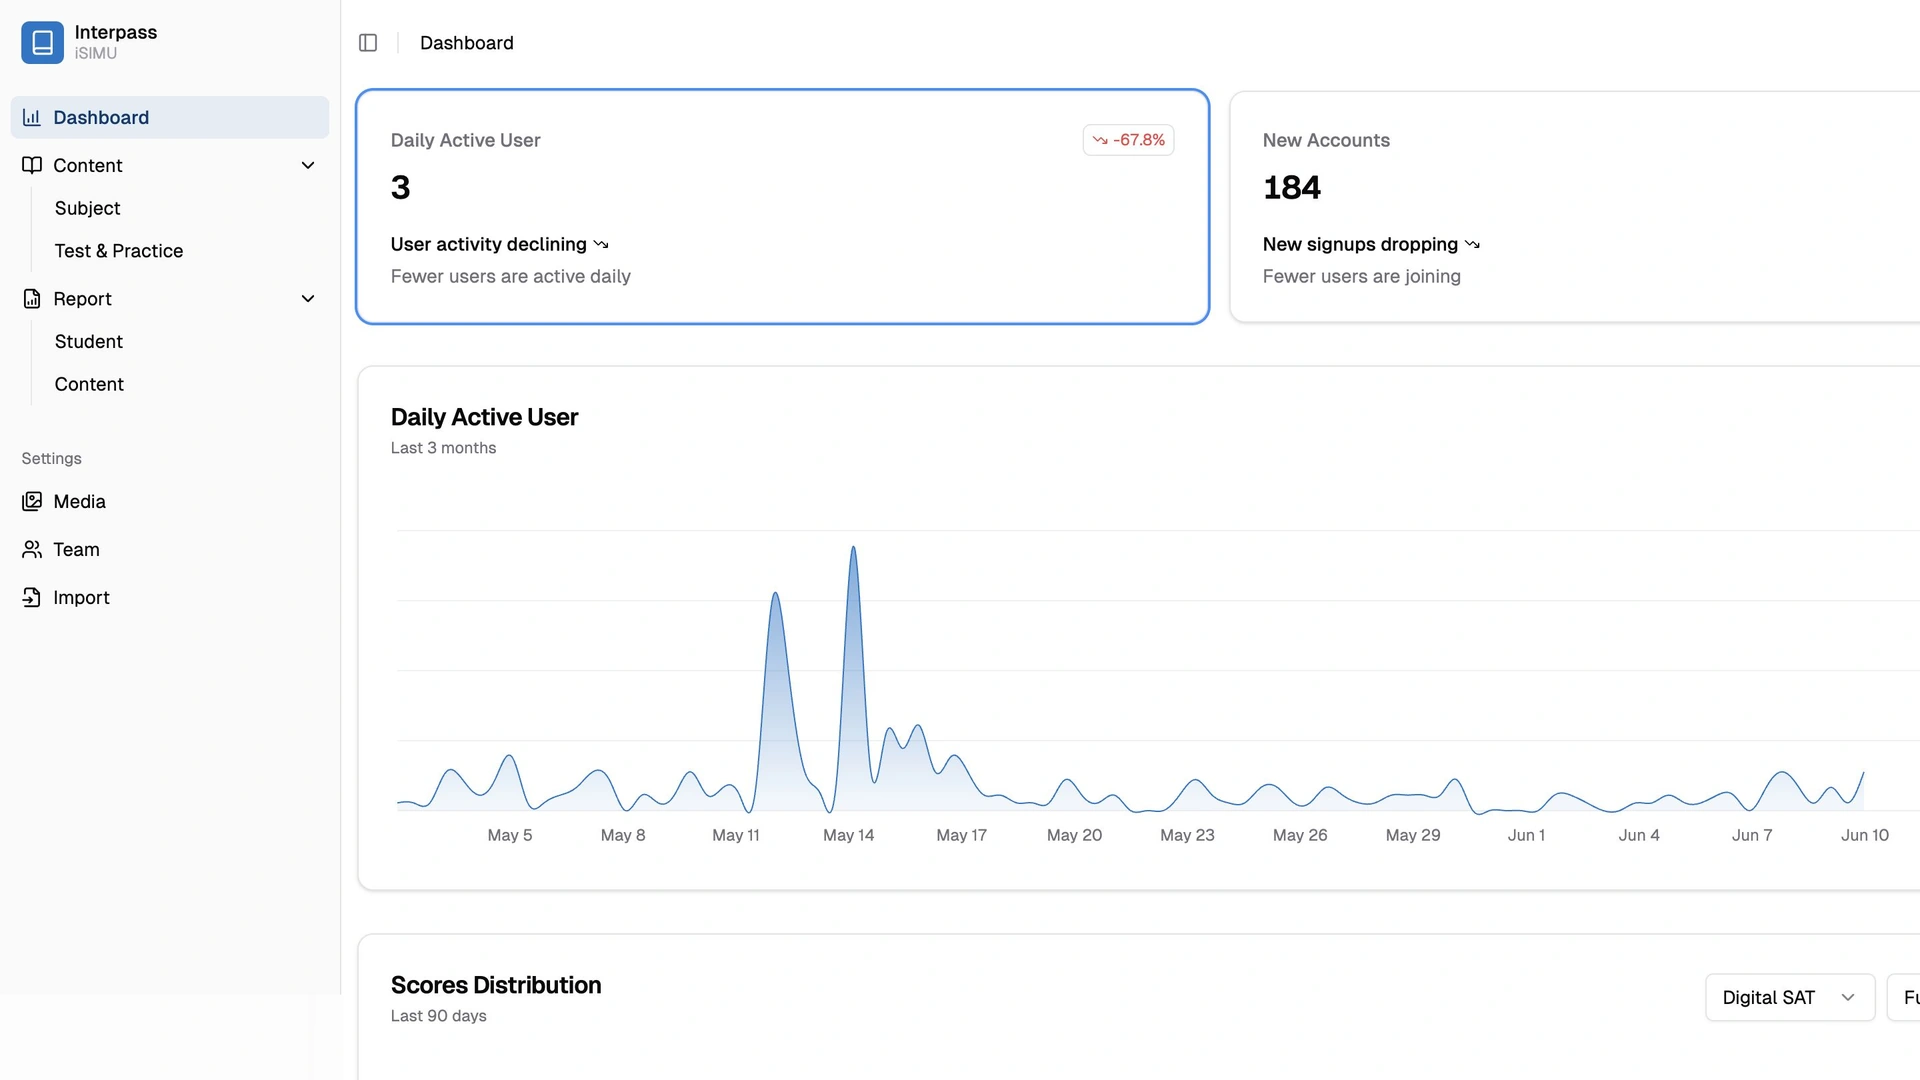
Step 02
Find a learnerSearch and status filters help staff move from an institution-wide view to the student who needs attention.
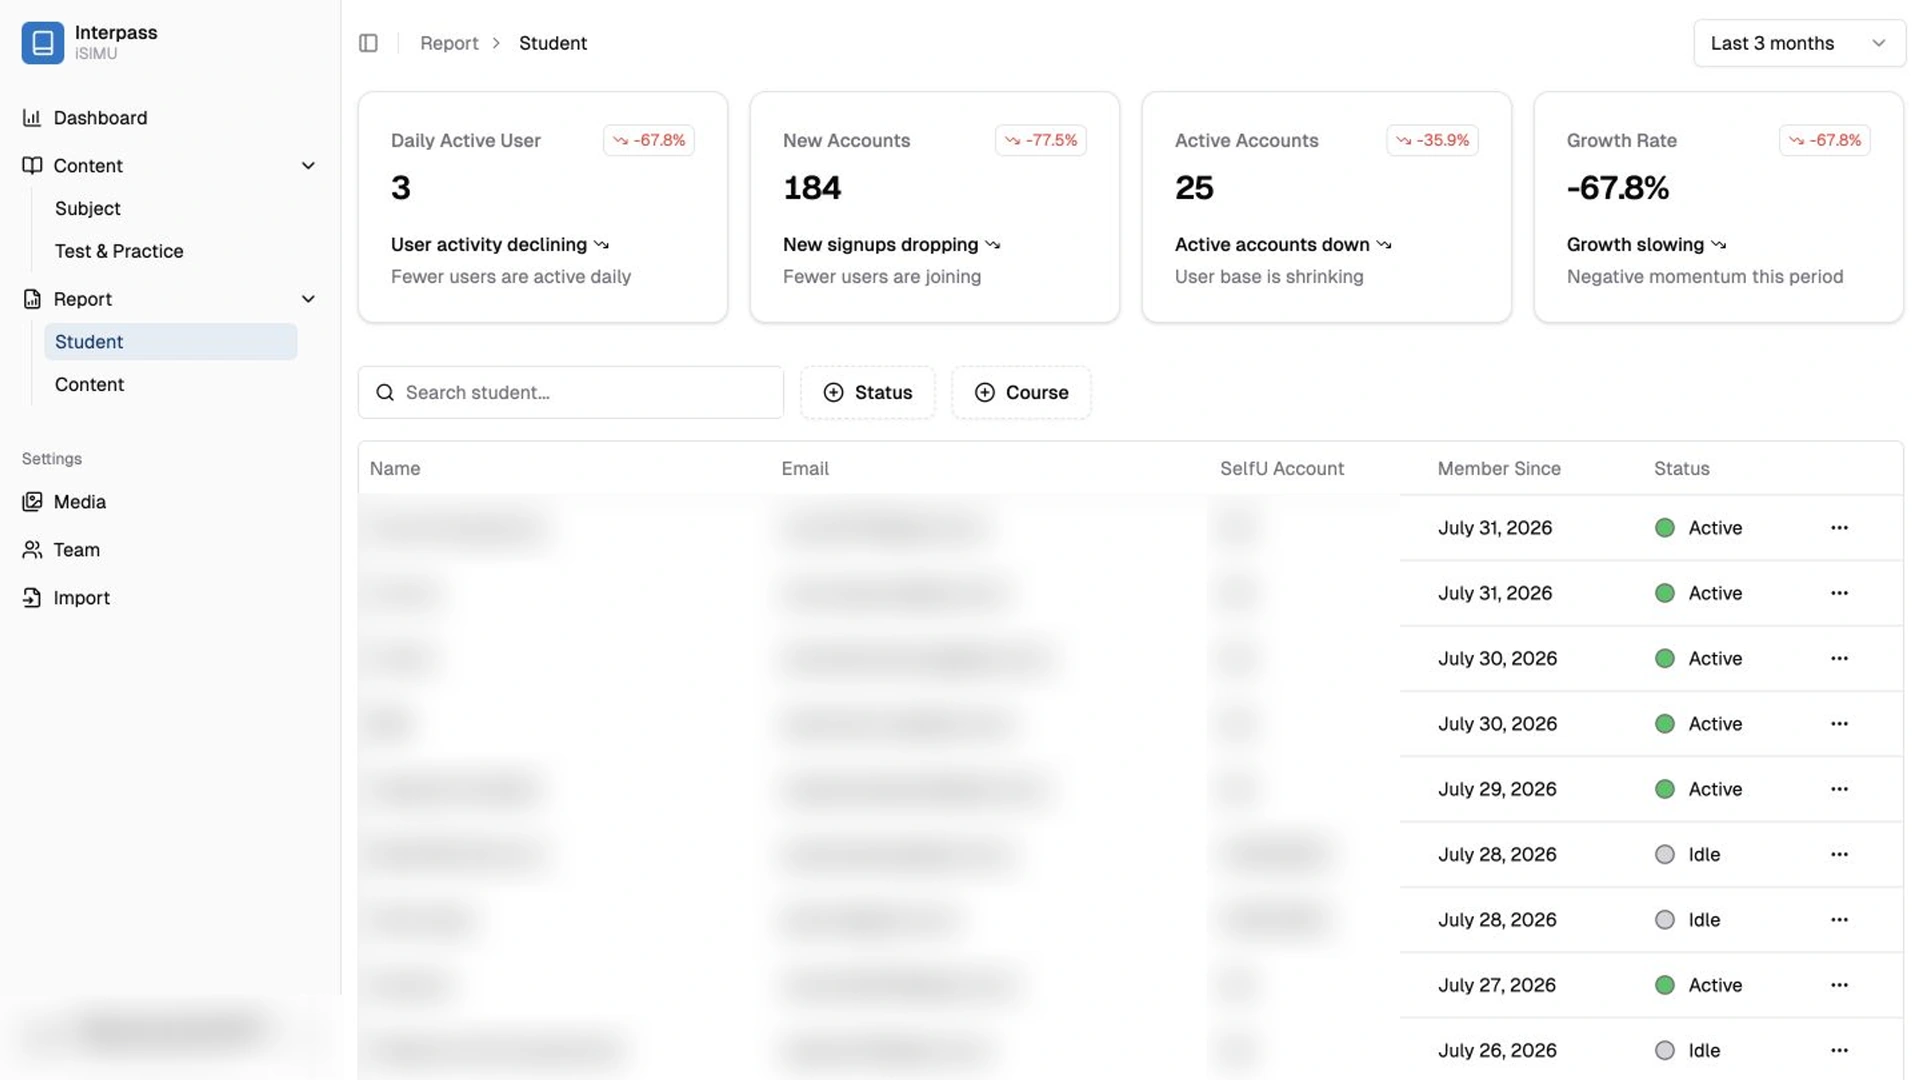
Step 03
Understand the learnerAn individual profile combines attempt history, time spent, course context, score trends, strengths, and weaknesses.
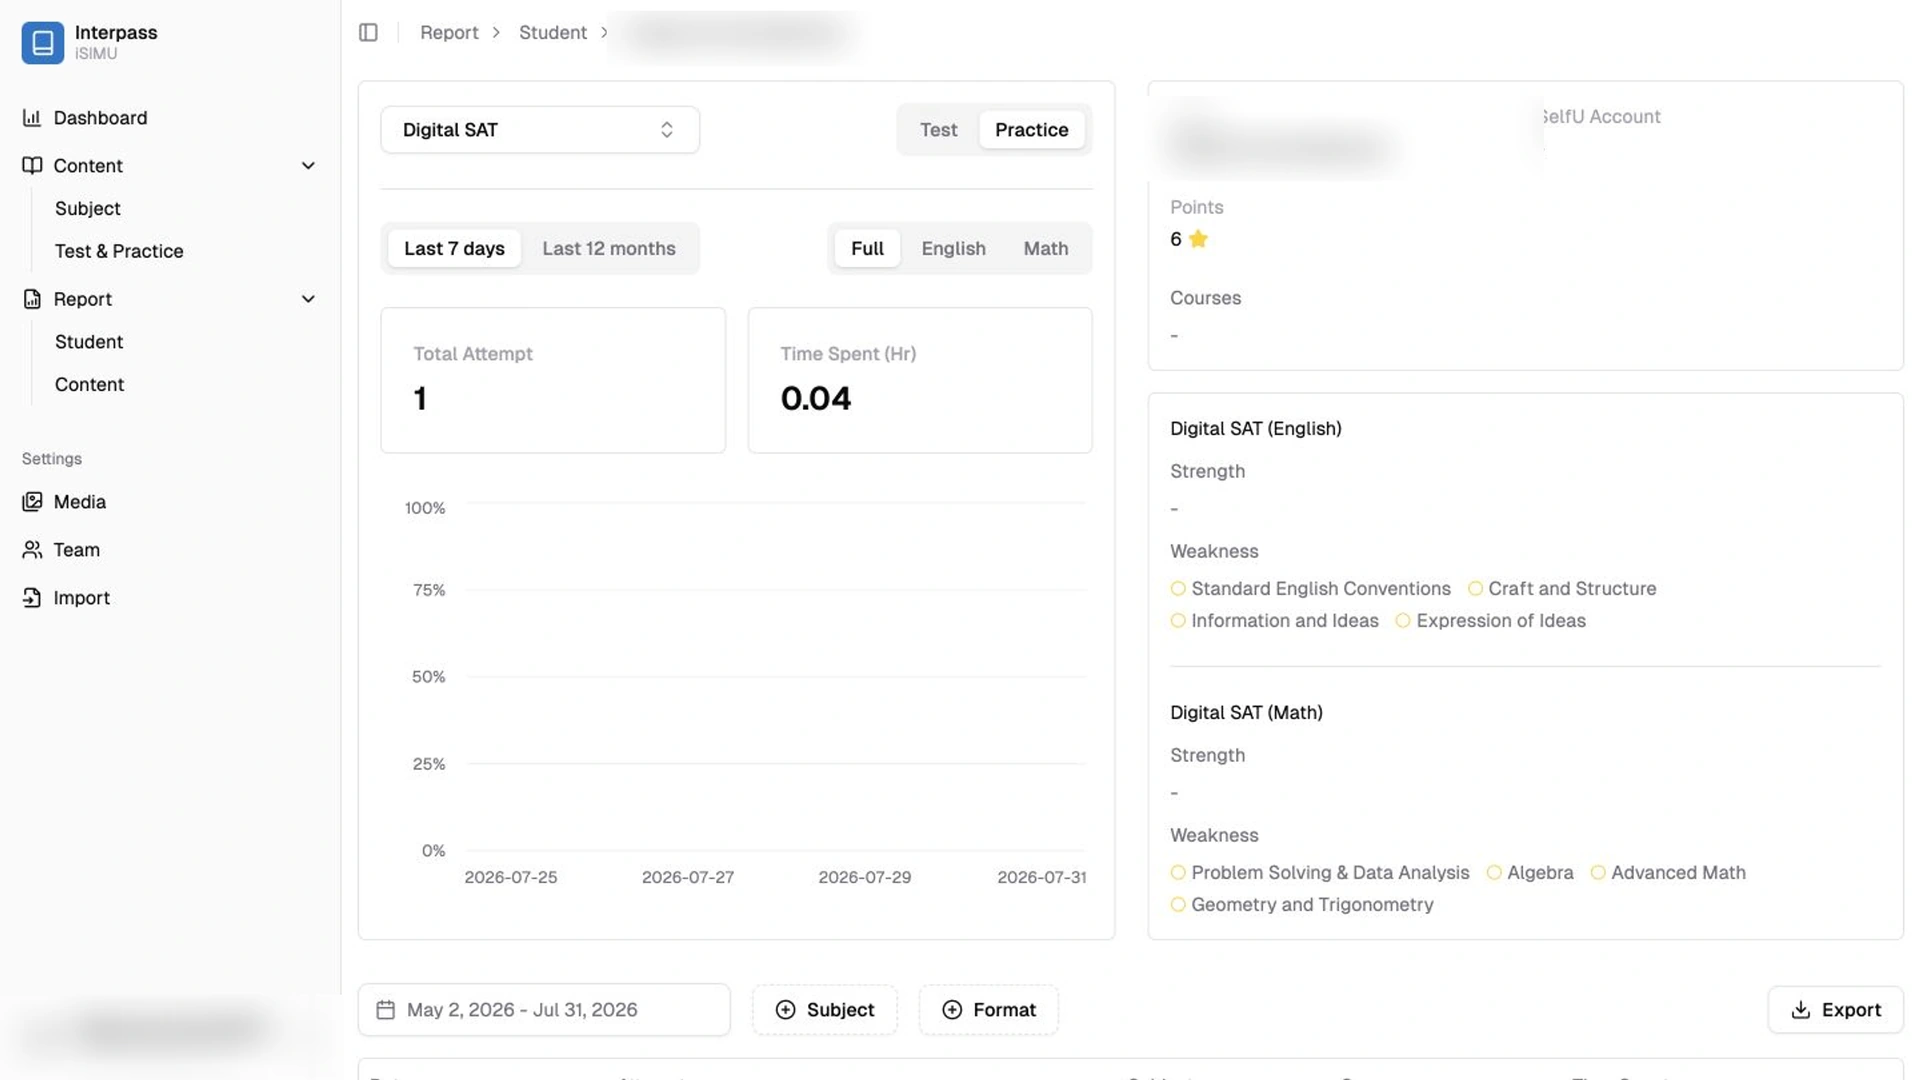
Step 04
Investigate an attemptTeachers can inspect every response and explanation, filter by subject, and export results for wider follow-up.
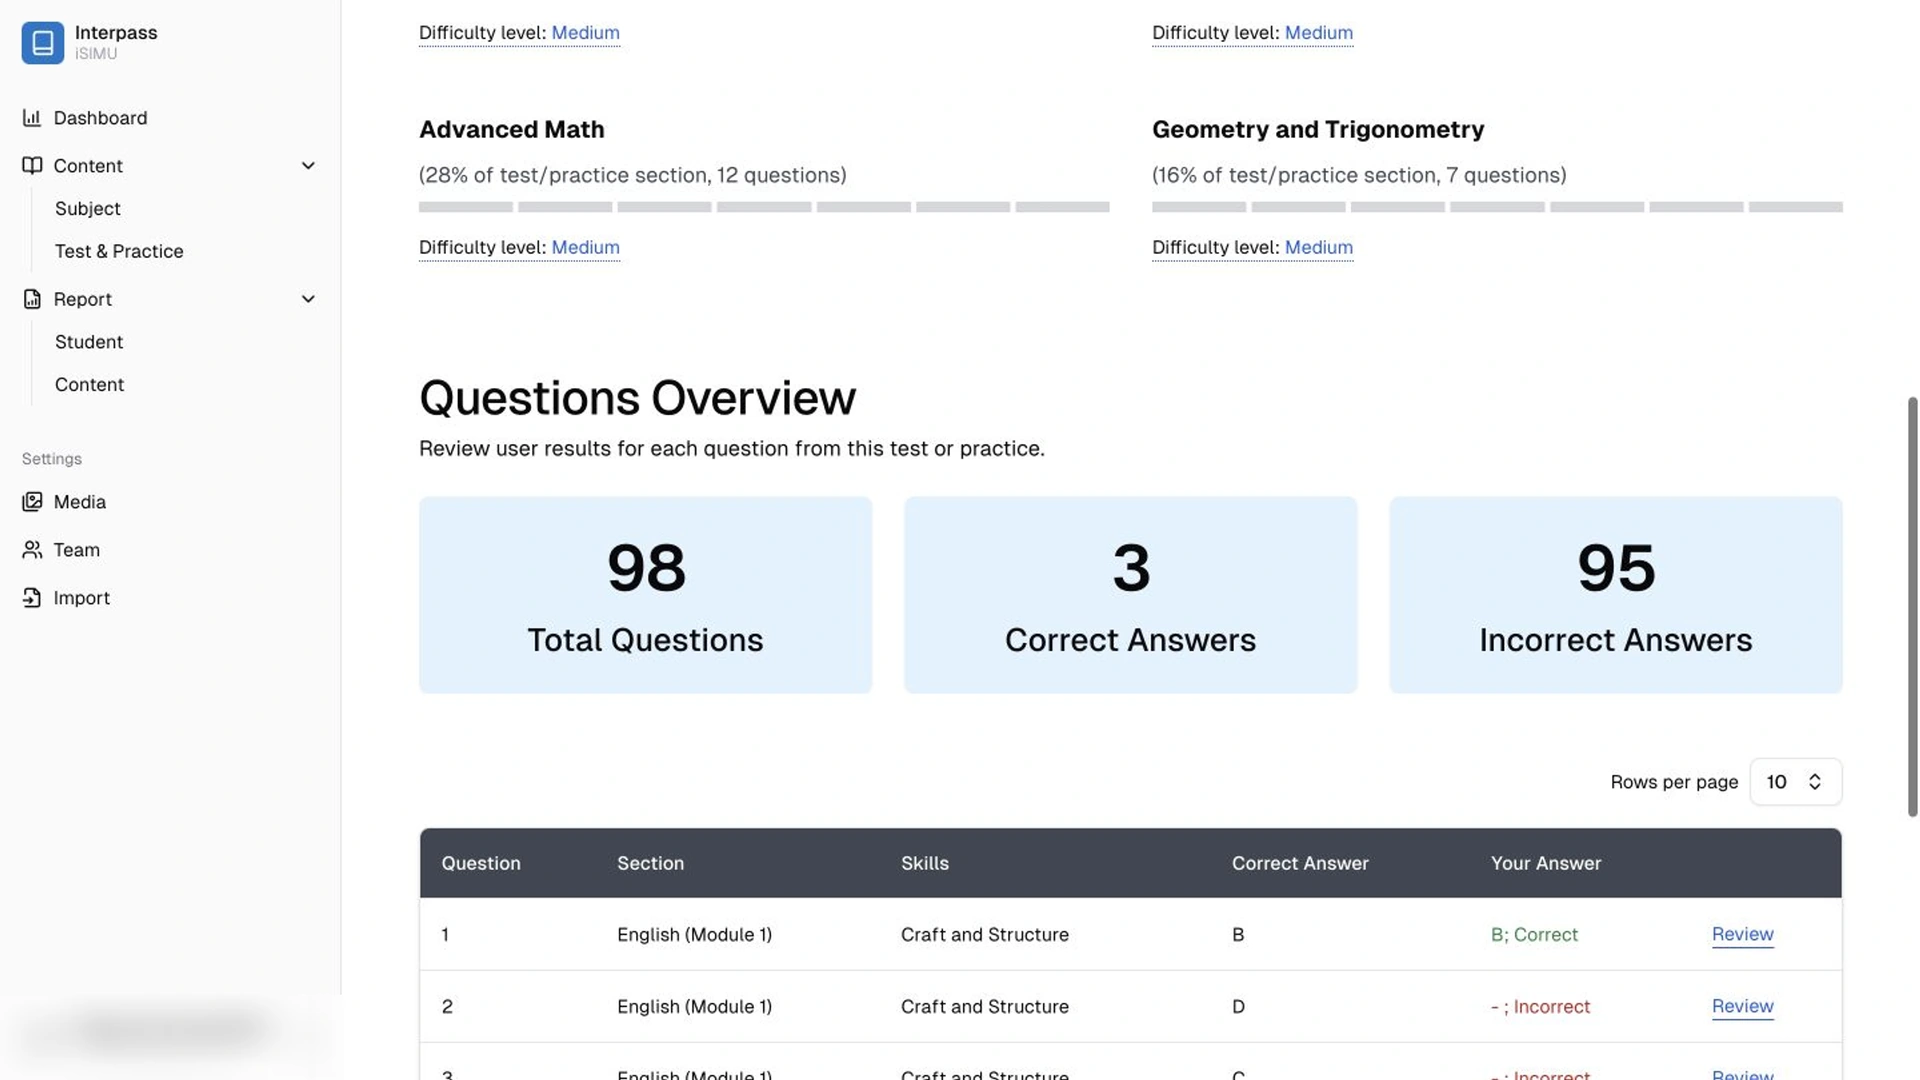
The right level of evidence for both leaders and teaching teams.
Around every workflow
The product tour is only part of the system. Testify also supports the everyday work that keeps an education service reliable and recognizable.
Apply your name, colors, and student-facing identity across the experience.
Manage team access and reusable visual assets from the same admin environment.
Onboarding, infrastructure, and ongoing technical support are part of the operating model.
See it with your own content
Request a free demo tailored to your institution, assessment programs, and reporting needs.